Study Overview
The Study Overview page provides a read-only summary of all study configuration settings. It is accessible from the study home page and gives a consolidated snapshot of the study's design, parameters, event structure, and installed app settings.
Path: Home → Study Name → Study Overview
Study Stages
The study workspace has three operational stages: Design, Available (Production), and Locked.
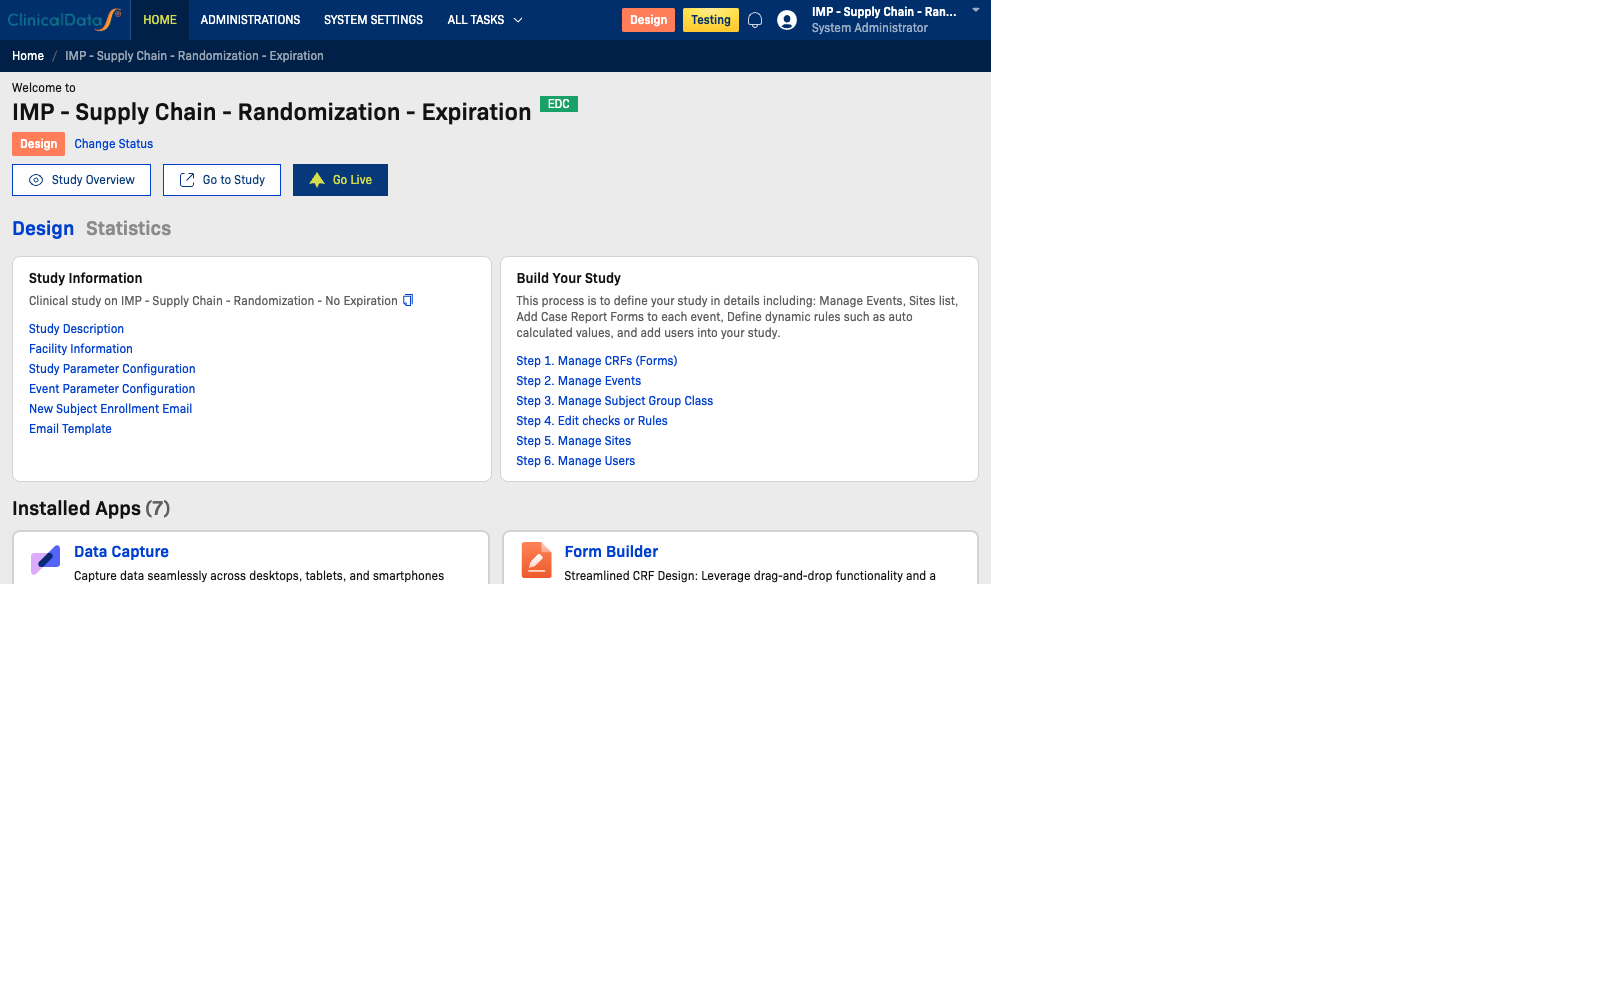
Design Stage
In Design mode, Study Administrators can prepare and structure the study before it goes live:
- Activate and configure the applications needed for the study
- Access a central dashboard for build progress and setup shortcuts
- Manage study definition components such as events, CRFs, sites, users, and rules
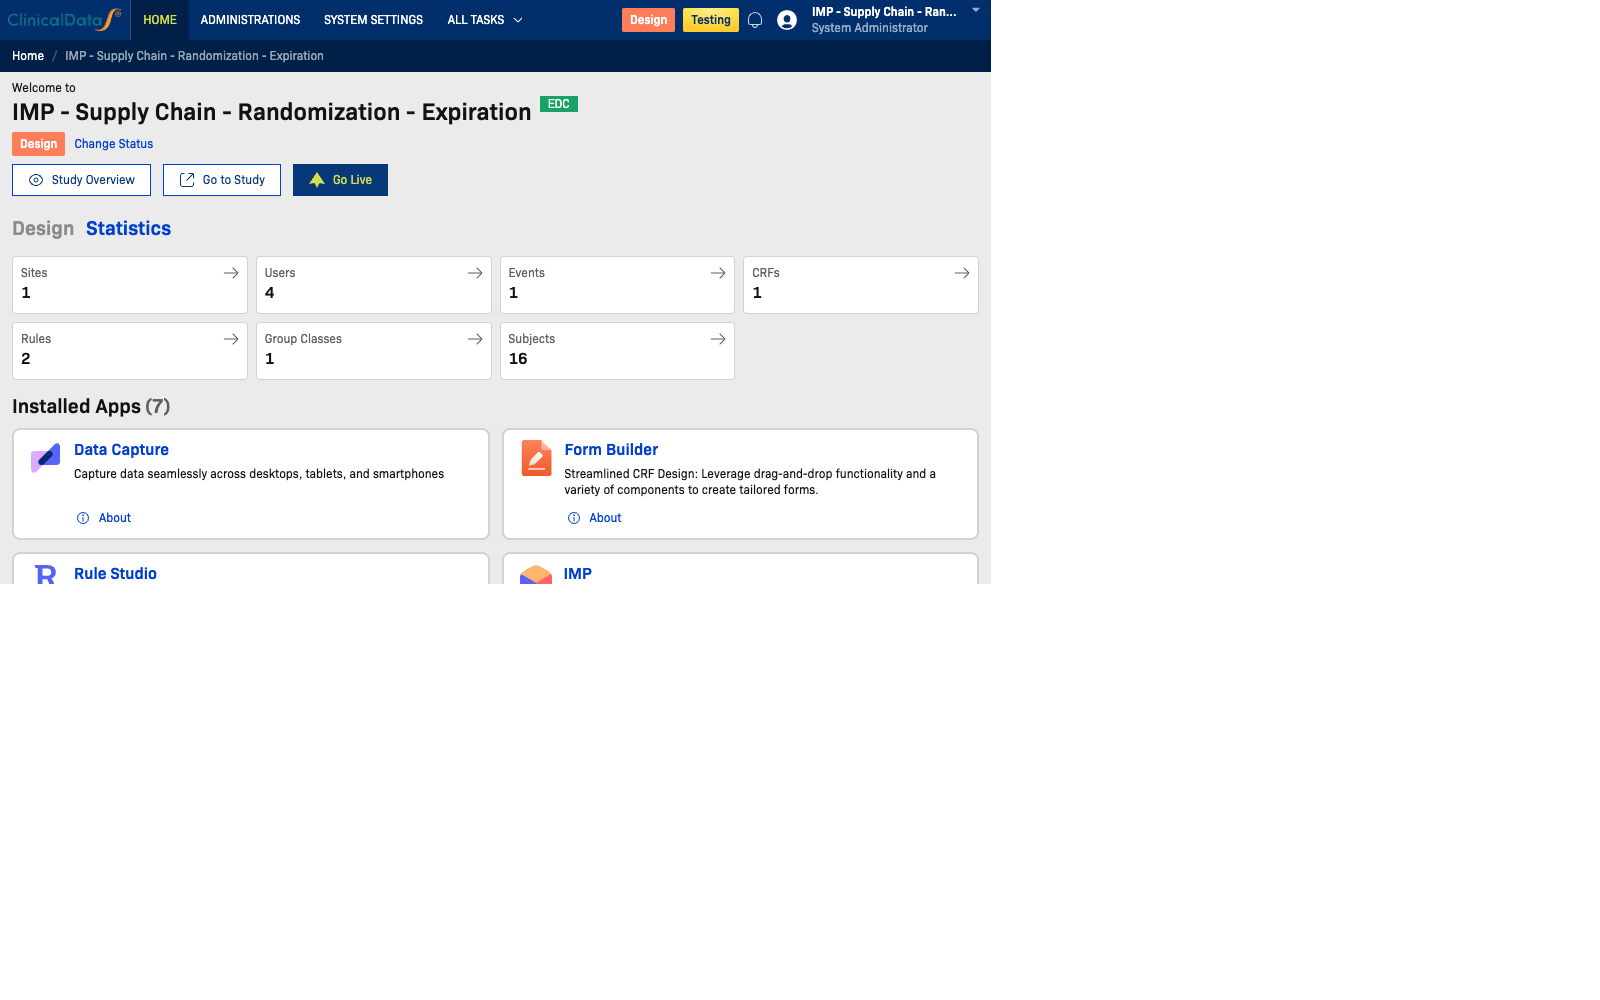
Available (Production) Stage
In Available mode, teams move into live study operations and monitoring:
- Review study statistics and operational KPIs
- Access overview metrics for Subjects, Events, CRFs, Rules, and Group Classes
- Navigate quickly to operational apps such as Subjects, Queries, and other study apps
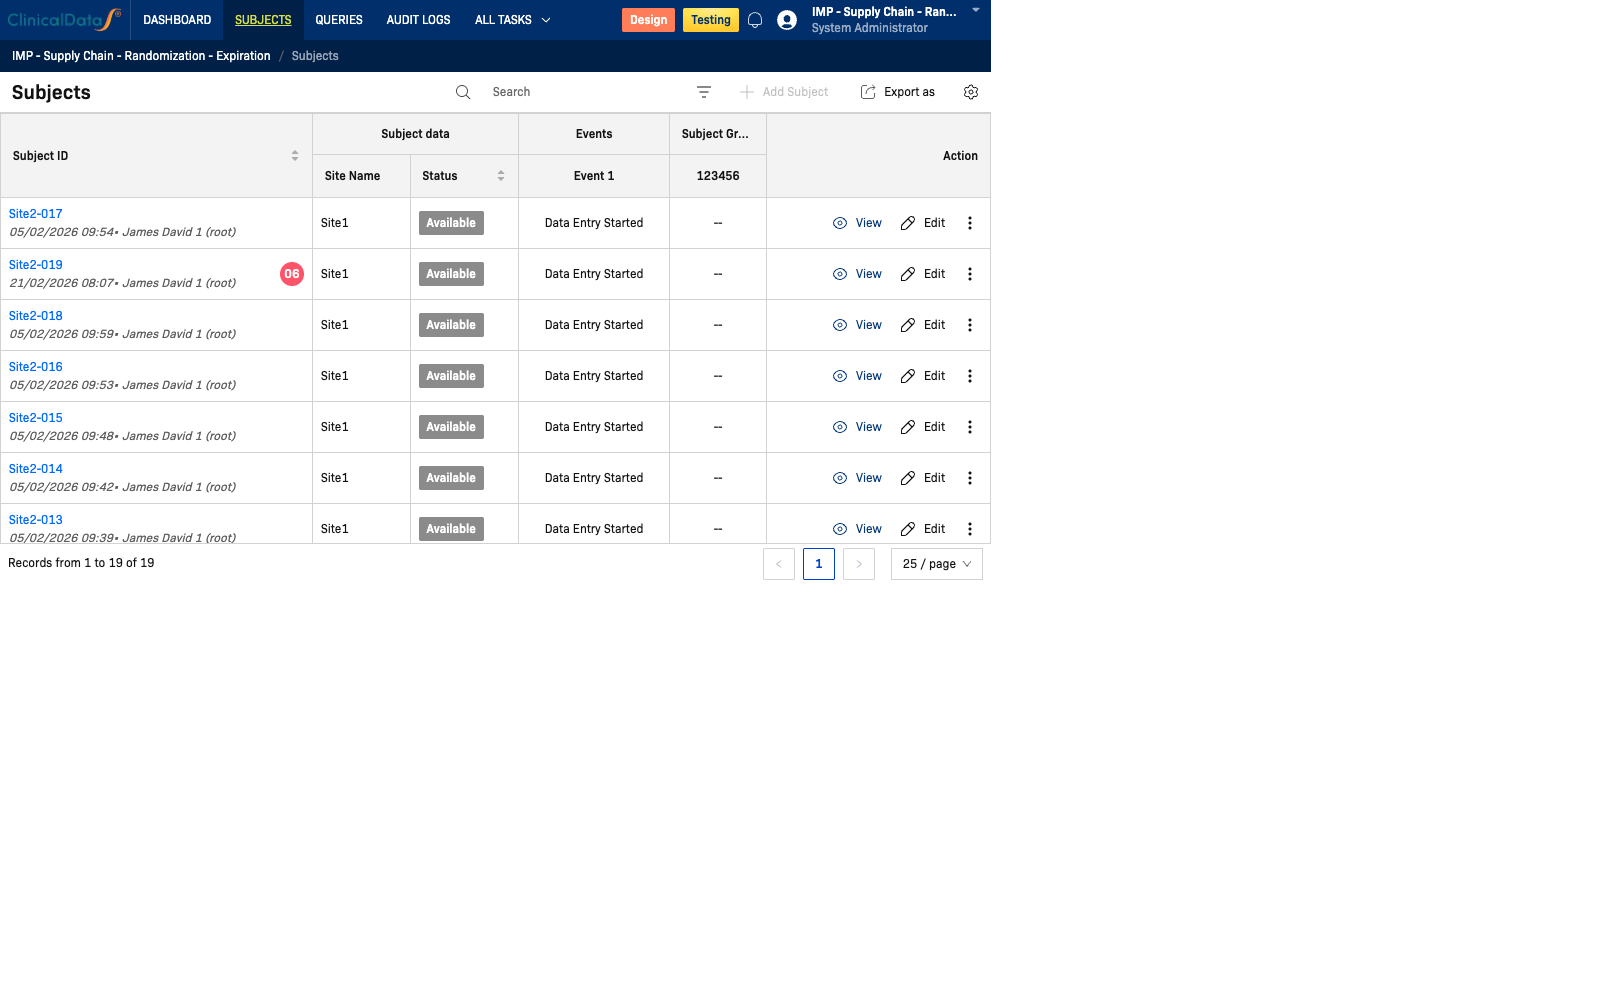
- Monitor subject-level event/CRF progress via the Subjects area
Going Live
When the study is ready for actual subject enrollment, you Go Live from the study home page. This transitions the study from Design to Production (Available) status.
-
Open the study home page.
-
Click the Go Live button.
-
Choose how to handle any existing test data:
Option Description Keep all current data Move to production without deleting any test data. Safest option if testing data should be preserved. Delete subject data only Remove all test subjects and their data, but keep study configuration. Use this to start fresh after completing setup validation. Delete all data Remove all test data including configuration snapshots. Full clean slate. -
Click I understand and Go Live.
-
The status badge changes from Design to Production.
⚠️ Go Live is not easily reversible. Once the study enters Production status, all data entry is treated as real clinical data. Ensure all CRFs, rules, events, sites, and randomization settings are fully validated before going live.
Tip: Run a full end-to-end test with a test subject (create → screen → randomize → data entry) before going live. This validates the CRF flow, rules, and randomization all work correctly together.
Study Information
The top section displays core study metadata:
| Field | Description |
|---|---|
| Study Name | The full name of the study |
| Brief Summary | A short description of the study |
| Unique Protocol ID | The unique identifier for the study protocol |
| Principal Investigator | Name of the lead investigator |
| Created On | The date the study was created |
| Sponsor | The sponsoring organization |
| Study Type | E.g., Phase I/II, Phase III |
| Protocol Type | E.g., Interventional, Observational |
| Expected Enrollment | Target number of subjects |
| Start Date | Planned study start date |
| Completion Date | Planned study completion date |
| Status | Current status (e.g., Available, Draft, Locked) |
Facility Information
Lists the facility details associated with the study:
| Field | Description |
|---|---|
| Facility Name | Name of the research facility |
| City | City where the facility is located |
| State | State/province |
| ZIP | Postal code |
| Country | Country |
| Contact Name | Primary facility contact |
| Degree | Contact's credentials/degree |
| Phone | Contact phone number |
| Contact email address |
Study Parameter Configuration
Subject Parameters
Defines how subjects are identified within the study:
| Field | Description |
|---|---|
| Subject ID Generation | Whether the ID is auto-generated or manually entered |
| Editable | Whether the subject ID can be edited after creation |
| Prefix | Prefix for the subject ID (e.g., SiteID) |
| Separator | Character separating prefix from number (e.g., -) |
| Digits | Number of numeric digits in the ID |
| Label | Display label for the subject identifier |
| Collect Enrollment Date | Whether enrollment date is required |
Data Entry Parameters
Controls how data entry sessions are configured:
| Field | Description |
|---|---|
| Interviewer Name | Whether the interviewer's name is collected |
| Interview Date | Whether the interview date is recorded |
| Timed Counting | Whether data entry is timed |
| Partial Data Entry | Whether partial data submissions are allowed |
Study Event Definitions
Lists all events defined in the study, including:
- Event Name
- Status
- Type (e.g., Scheduled Event)
- CRFs assigned to the event
Apps Settings
Displays the configuration of installed study apps. For example:
Randomization
| Setting | Value |
|---|---|
| Blind Type | Single Blind |
| Design | Permuted Block Design |
| Study Groups | e.g., L1 (code=1, weight=1), L2 (code=2, weight=1) |
| Block Size | e.g., 2 |
| Generate At | Real-time |
| Randomization Event | The event where randomization occurs |
| Position | Position within the event (e.g., At first position) |
SDV
| Setting | Value |
|---|---|
| Allow SDV when Queries Open | Yes / No |
| Allow SDV when CRF not Verified | Yes / No |
Note: This page is read-only. To modify any of these settings, use the respective configuration pages within the study setup or app settings.