Overview
Use the Queries module to manage data discrepancies, clarification requests, and notes across the whole study.
Path: Study Workspace → Queries
Workspace URL pattern: https://[instance]/study/[studyId]/query
Live example used in this guide: https://test-2025.clinicaldatas.net/study/S_6IqmI4UzZ9vRtidwFp/query
What Study Staff Can Do
- Monitor all open discrepancies from one central list
- Review status by query type and lifecycle state
- Open each thread to view context and history
- Reply to queries with standardized descriptions
- Close queries with standardized close reasons
- Jump to the exact CRF record using View within record
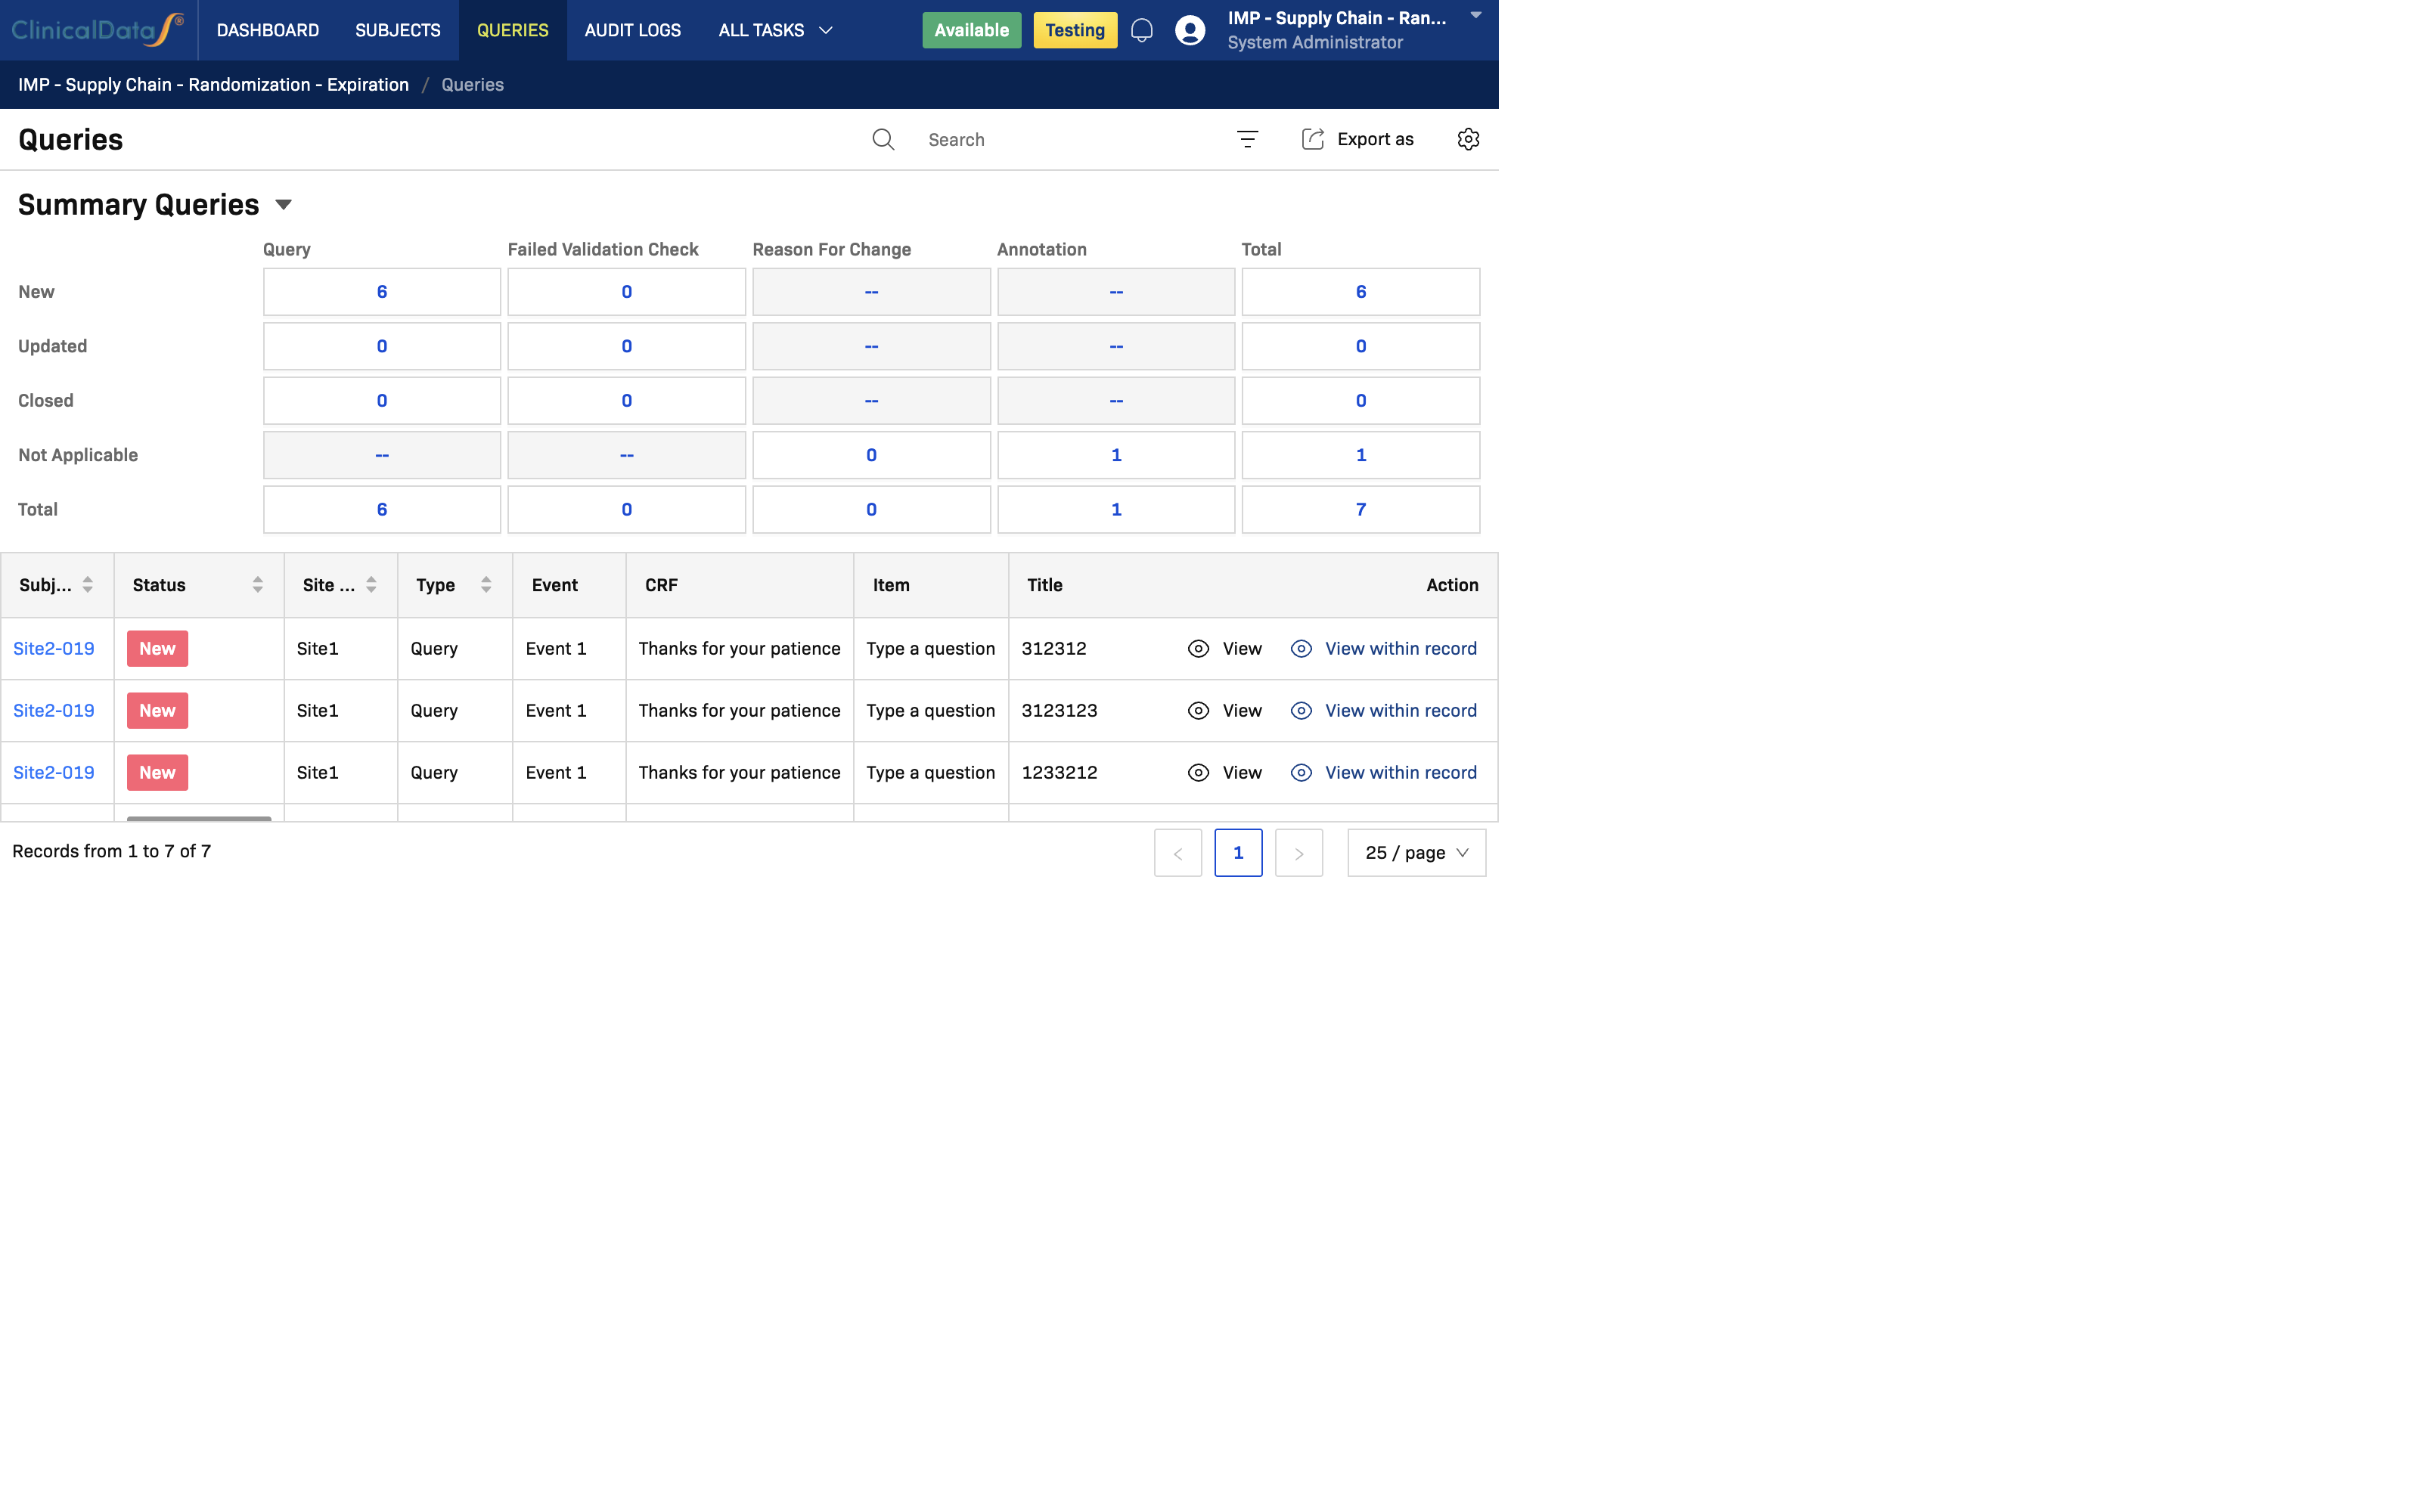
Understand the Summary Panel
The Summary Queries panel gives an at-a-glance view by:
- Type: Query, Failed Validation Check, Reason For Change, Annotation
- Status: New, Updated, Closed, Not Applicable, Total
Use this panel to prioritize work quickly (for example, focus on New items first).
Work with the Query List

Key Columns
| Column | What it means |
|---|---|
| Subject ID | Subject related to the discrepancy |
| Status | Query status (New, Updated, Closed) |
| Site name | Site where the discrepancy originated |
| Type | Query category (Query / Failed Validation Check / RFC / Annotation) |
| Event | Study event/visit |
| CRF | Form where the issue occurred |
| Item | Data item/field name |
| Title | Short query title |
| Detailed Description | Query content |
| Assigned User | Current owner |
| Created On / Created By | Audit details |
| Action | View or View within record |
Common Actions
- Click View to open the thread and respond.
- Click View within record to open the exact CRF record and review source context.
- Use the search box to find subject-, event-, or text-specific queries.
- Use Export as when sharing query status with study teams.
Reply to a Query
When you click View, the query thread dialog opens.
To reply:
- Open a query from the list with View.
- Go to the Reply tab.
- Enter Detailed Notes.
- Select a value in Description (or type a custom value).
- Assign to a user if needed.
- Click Submit.
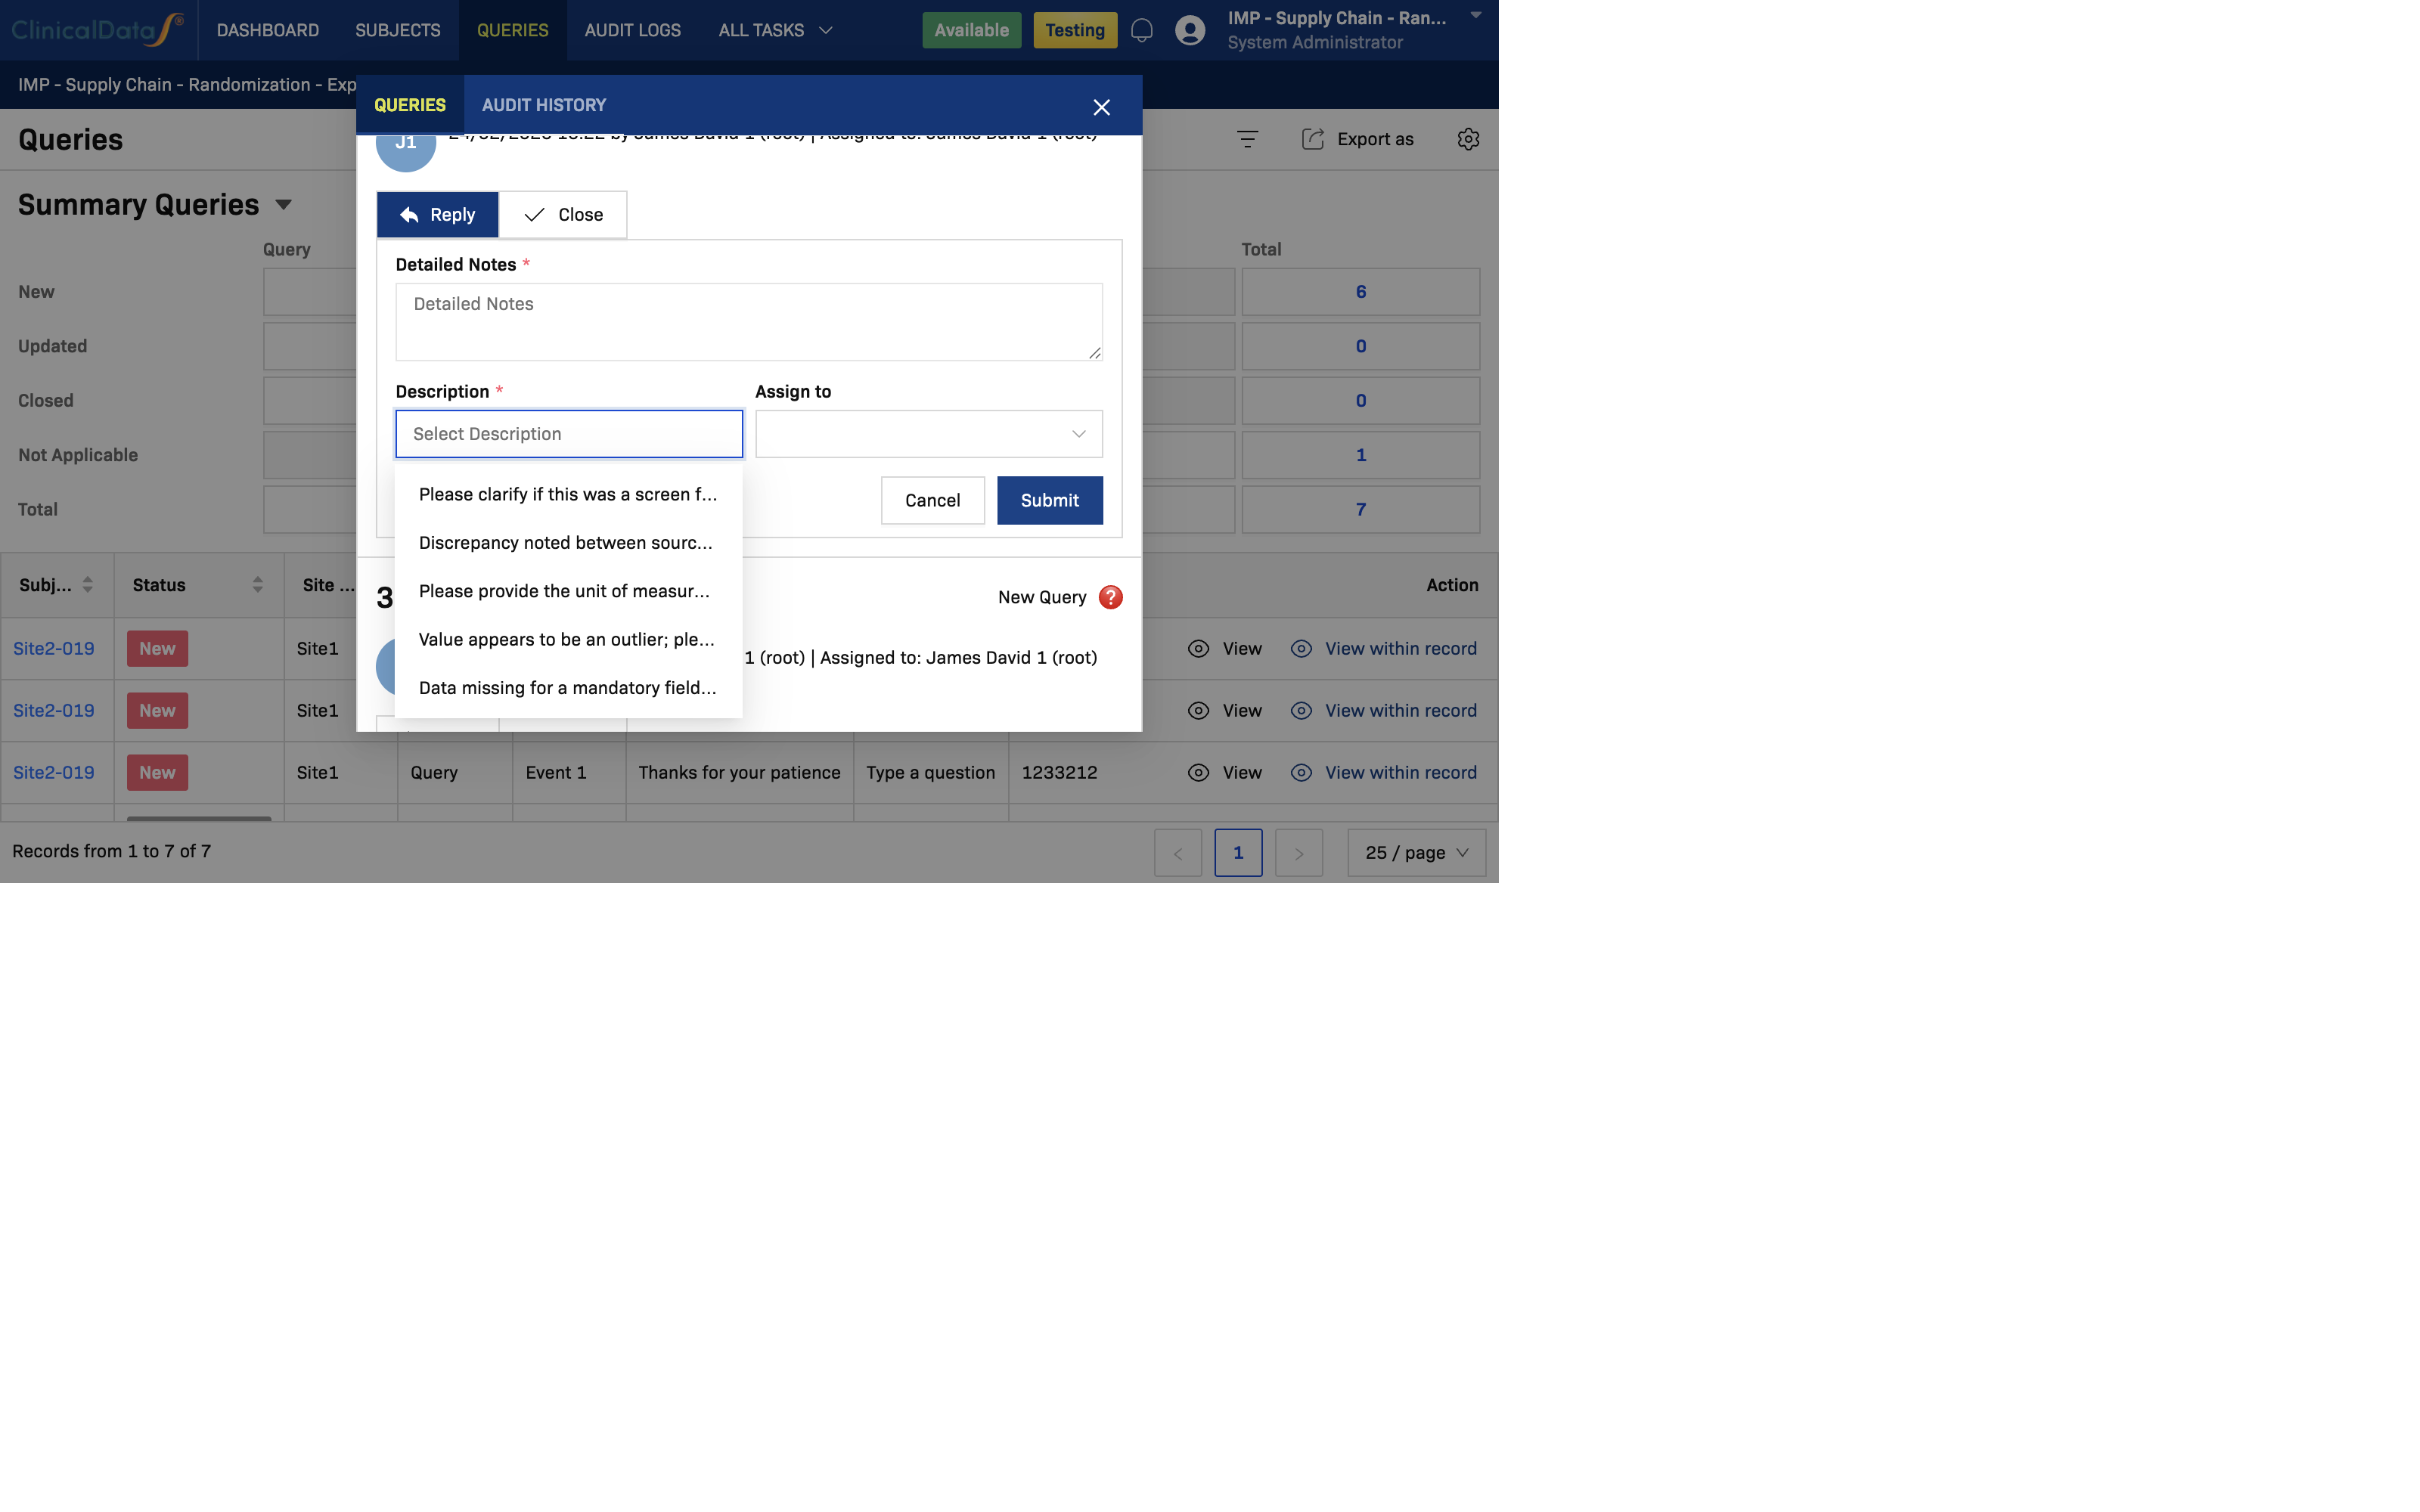
How Description Options Are Filled
The dropdown options are populated from the Queries configuration page:
This lets staff select standardized wording instead of repeatedly typing similar responses.
Close a Query
To close a query:
- Open the query thread with View.
- Switch to the Close tab.
- Enter Detailed Notes.
- Select a close reason in Description.
- Assign if required by your workflow.
- Click Submit.
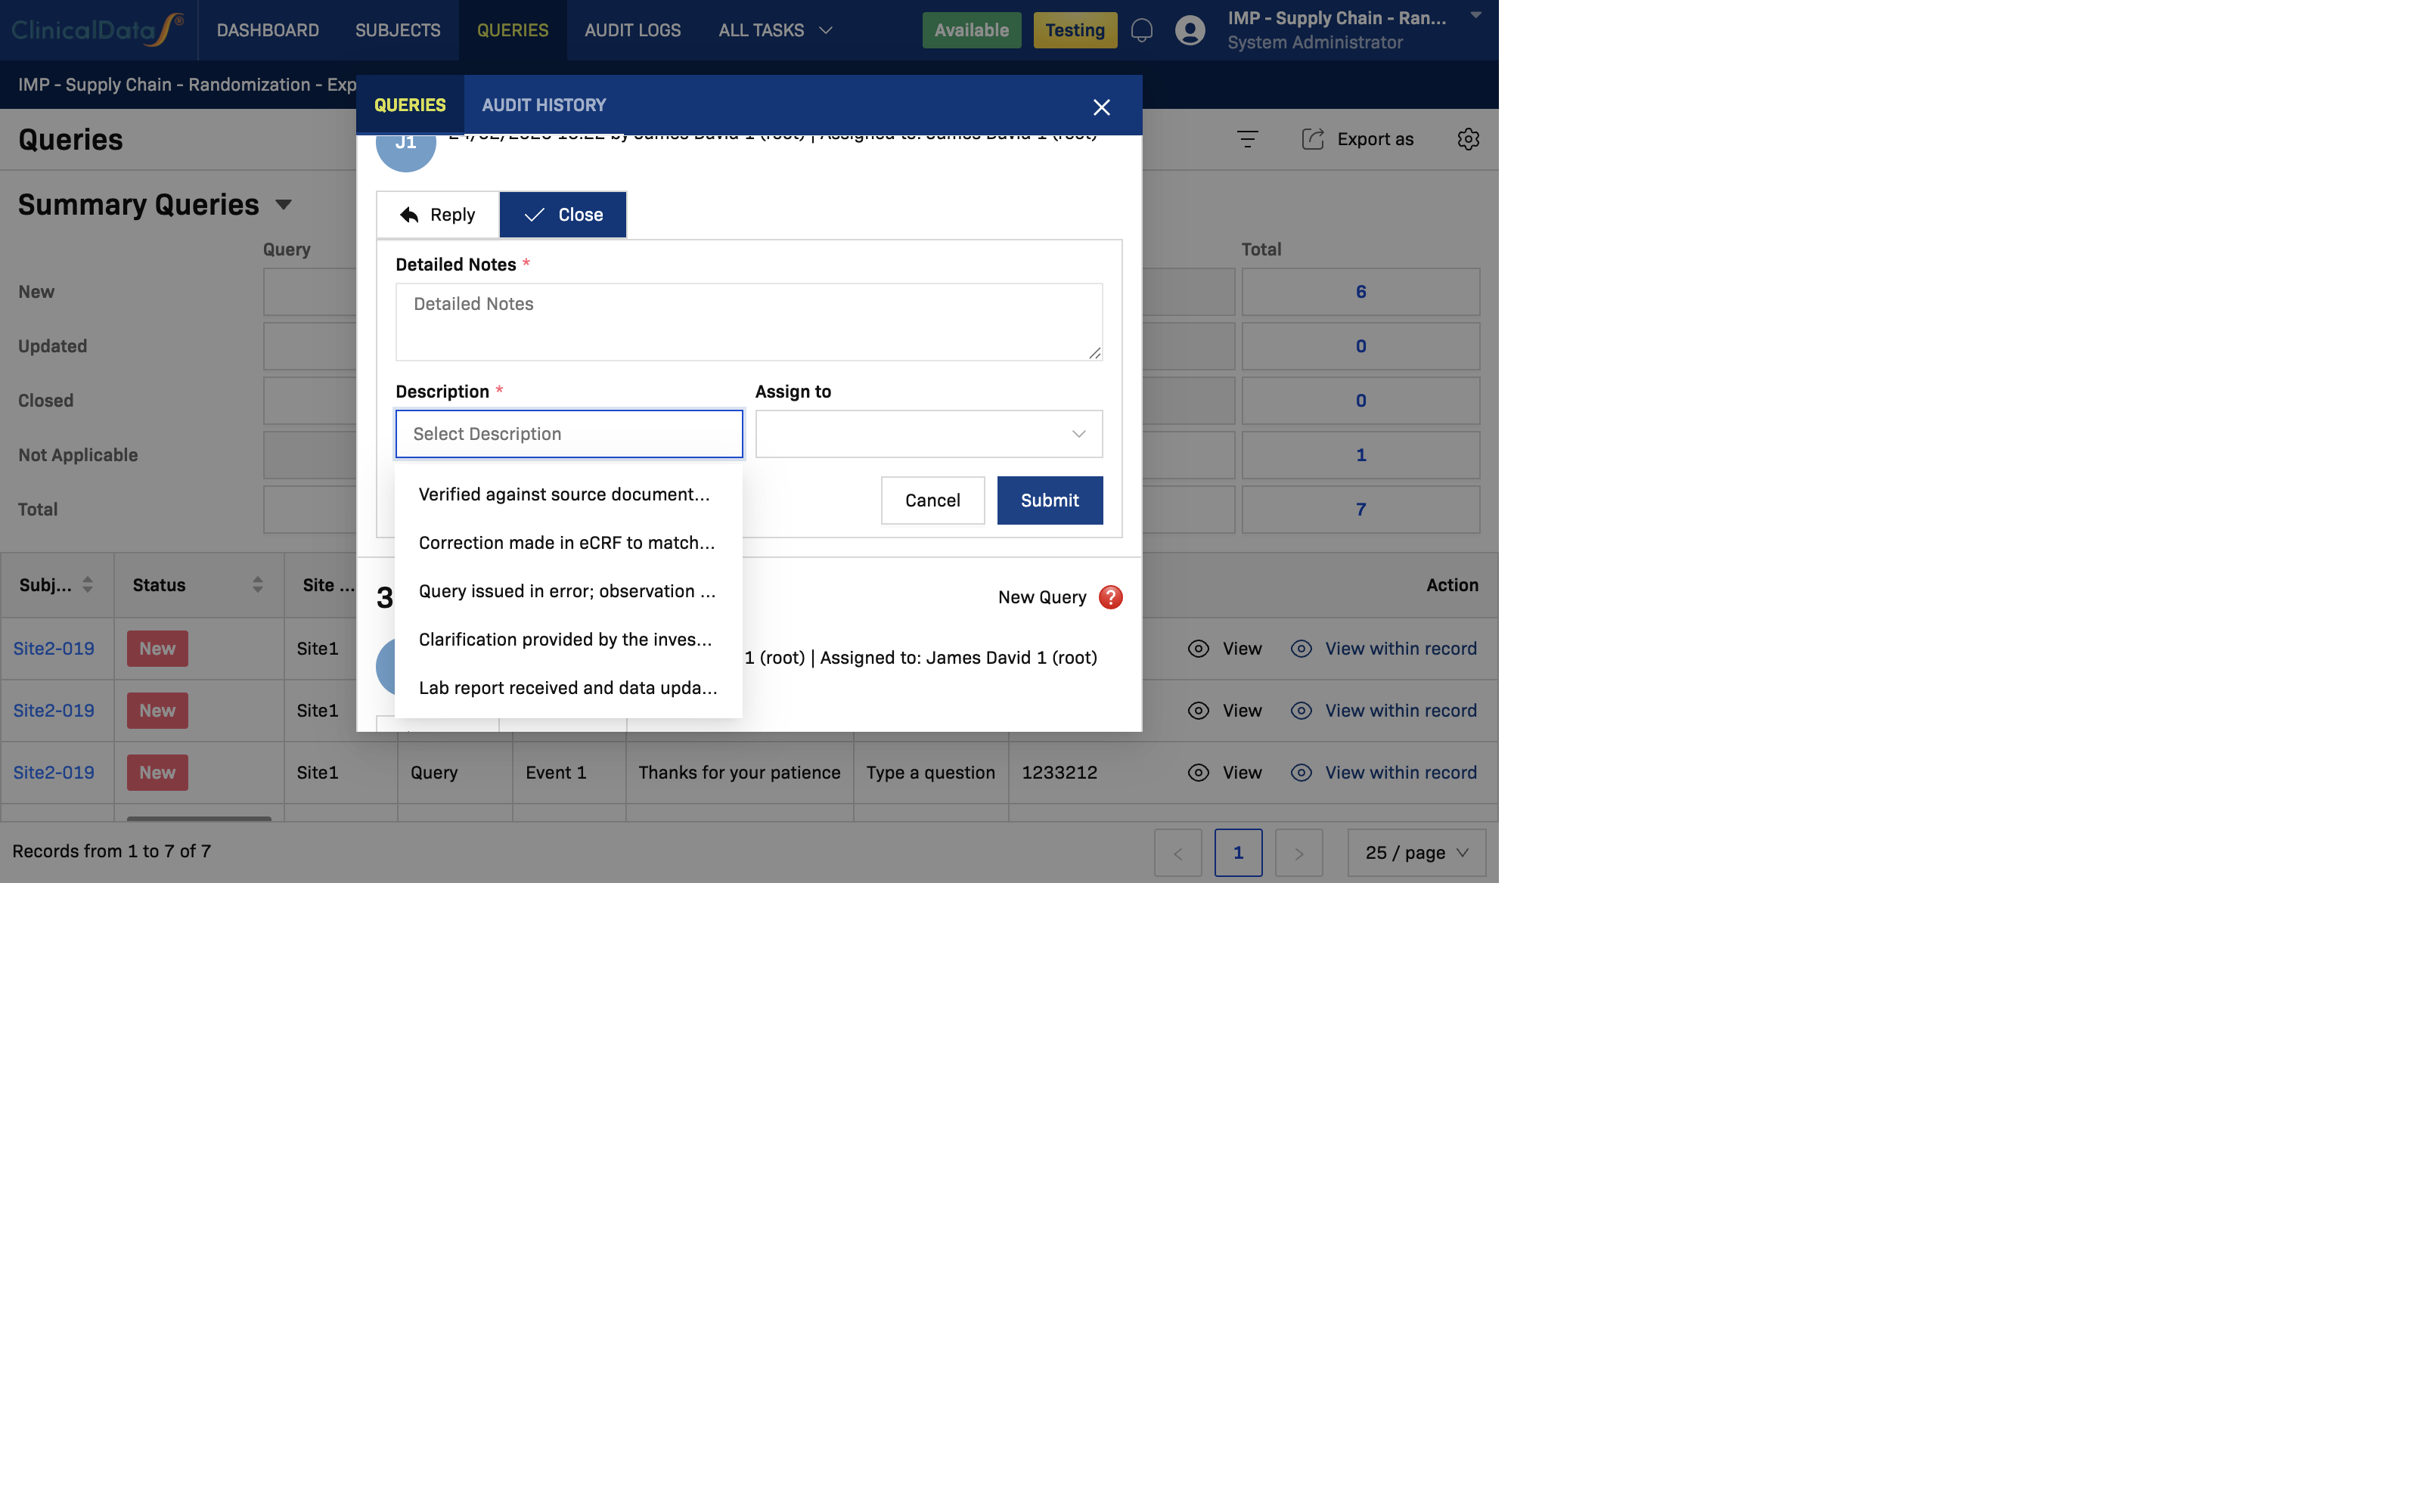
Use close reasons that accurately reflect how the issue was resolved (source verified, corrected in CRF, no longer applicable, etc.).
Suggested Daily Workflow for Study Staff
- Open the Queries module at the start of day.
- Check Summary Queries and prioritize
Newitems. - Process by site/event ownership.
- Use standardized descriptions for consistency.
- Escalate unclear items by reassigning in the thread.
- Close only after source verification or clear resolution.