Overview
The Randomization configuration page is where study teams set up treatment allocation rules before subjects are randomized. On this page, you configure blinding, algorithm settings, randomization event, optional sample-size calculation, pre-randomization questions, and notification recipients.
Configuration URL pattern: https://[instance]/home/study/[studyId]/apps/randomization
Who uses this page
This page is typically used by Study Administrators or Sponsor-side setup users with design permissions.
If the study is in Production status, configuration controls can be disabled. In that case, switch the study back to Design status before making changes.
Typical workflow
- Open the study and go to Randomization.
- Set blinding method and randomization algorithm.
- Configure algorithm-specific settings (study groups, block/stratification settings).
- Select the event used for randomization.
- Optionally run the sample-size calculator.
- Define additional pre-randomization questions.
- Set email notification recipients.
Step-by-step configuration
Step 1: Open the Randomization page
- Open the target study.
- In Installed Apps, select Randomization.
- Review the configuration cards on the main page.
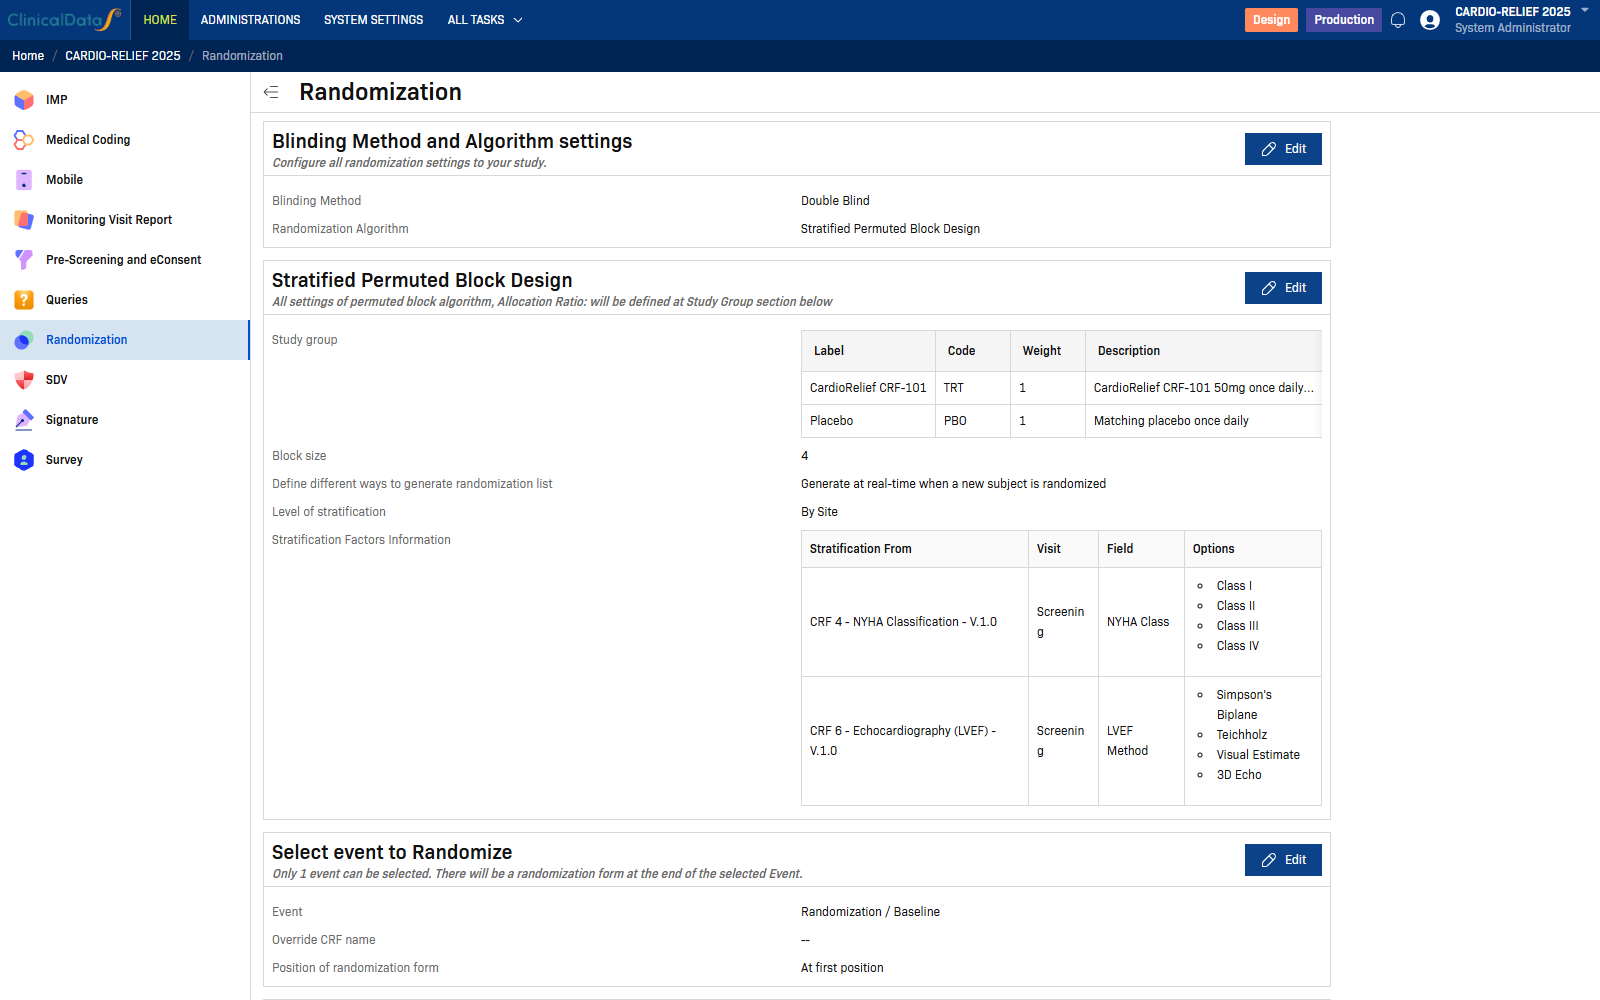
Main cards shown on the page:
- Blinding Method and Algorithm settings
- Algorithm-specific settings card (for example, Stratified Permuted Block Design)
- Select event to Randomize
- Sample Size
- Additional data before Randomization
- Email Notification
Step 2: Configure blinding and algorithm
In Blinding Method and Algorithm settings, select Edit.
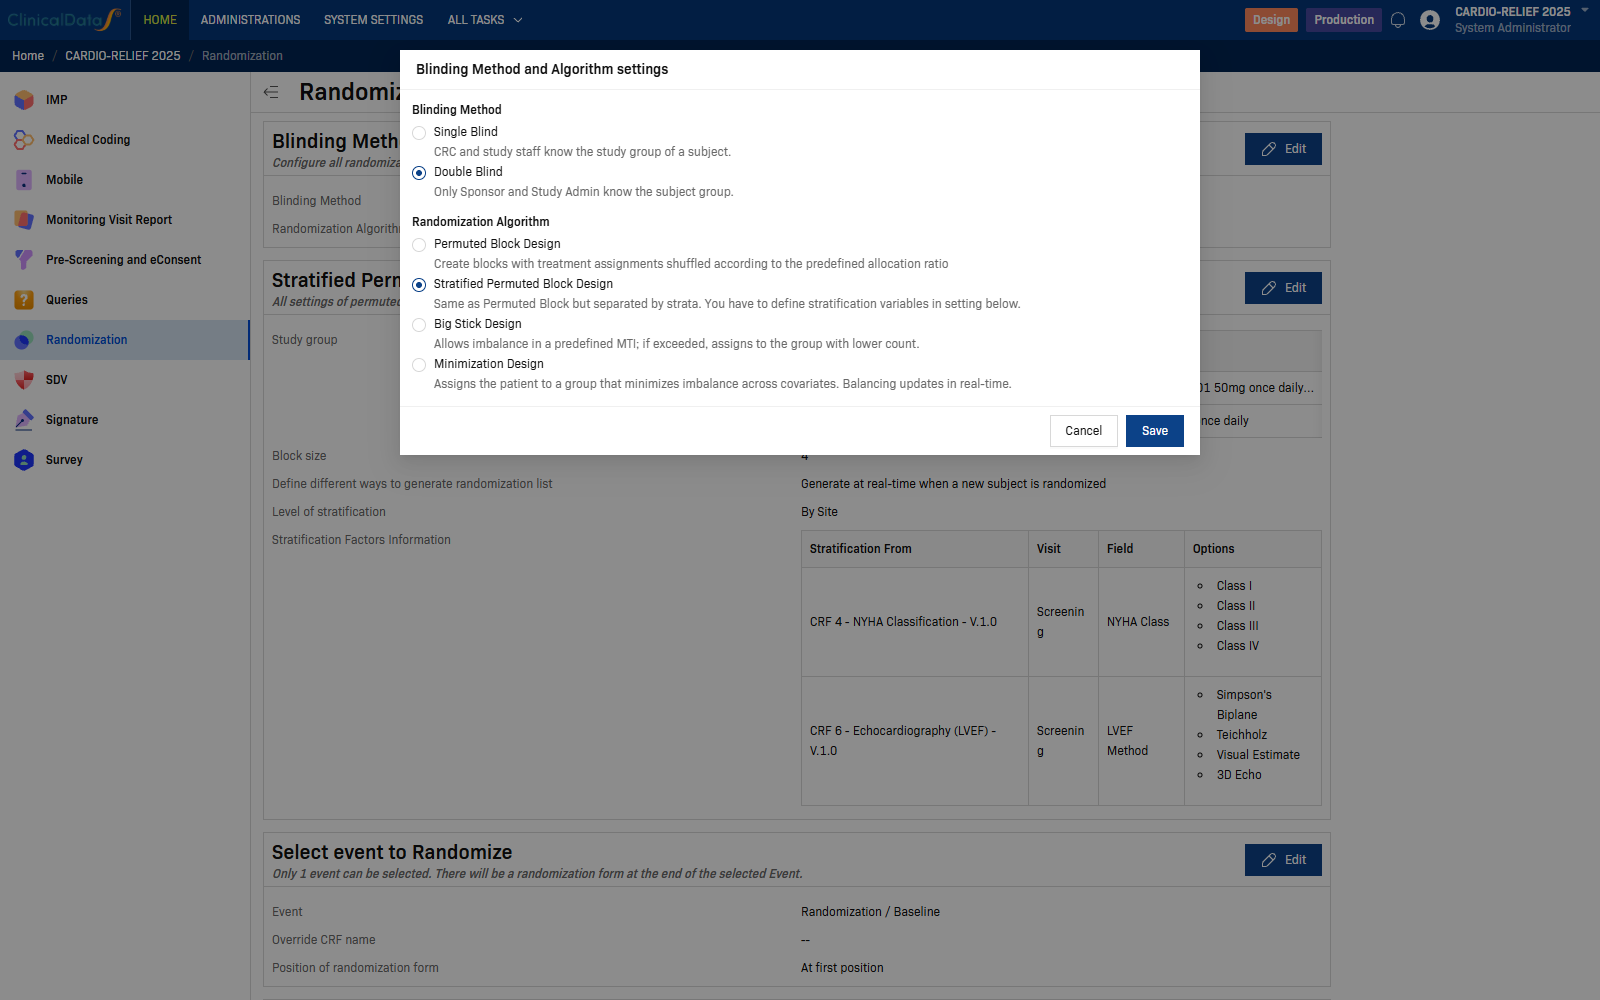
Blinding methods:
| Option | Description |
|---|---|
| Single Blind | CRC and study staff know the study group of a subject. |
| Double Blind | Only Sponsor and Study Admin know the subject group. |
Randomization algorithms:
| Algorithm | Description |
|---|---|
| Permuted Block Design | Create blocks with treatment assignments shuffled according to the predefined allocation ratio. |
| Stratified Permuted Block Design | Same as Permuted Block but separated by strata. Define stratification variables in settings below. |
| Big Stick Design | Allows imbalance in a predefined MTI; if exceeded, assigns to the group with lower count. |
| Minimization Design | Assigns the subject to a group that minimizes imbalance across covariates with real-time balancing. |
Select Save.
Step 3: Configure algorithm-specific settings
After saving the algorithm, configure the algorithm card that appears below. In this study, the card is Stratified Permuted Block Design.
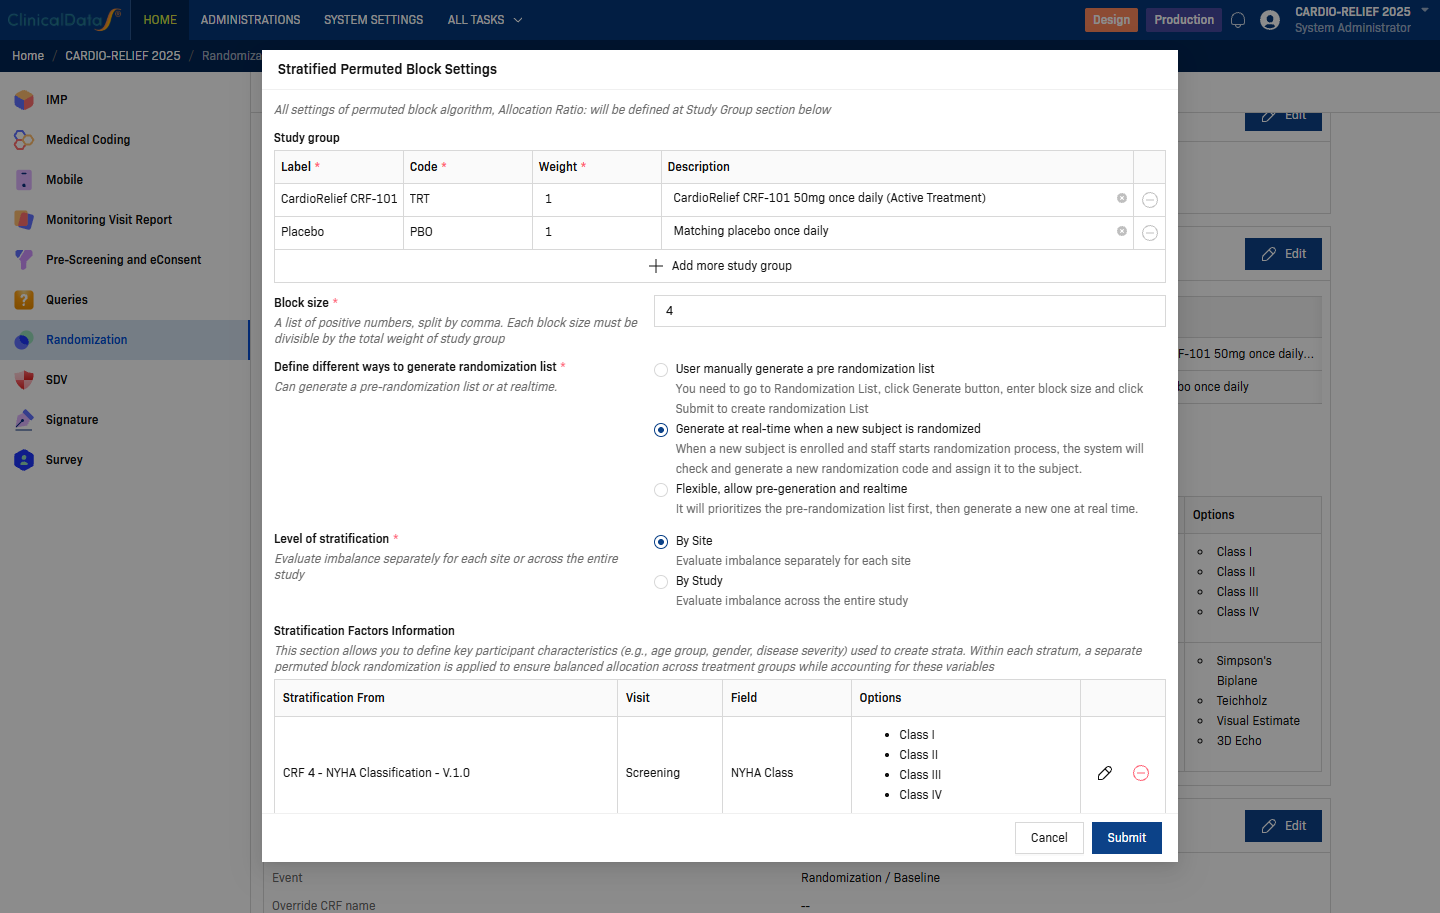
Common fields:
| Setting | Description |
|---|---|
| Study Group | Add one row per treatment arm (Label, Code, Weight, Description). |
| Block size | Number of subjects per block. |
| Define different ways to generate randomization list | Choose real-time generation or pre-generated list behavior based on study needs. |
| Level of stratification | For stratified algorithms, select By Site or By Study. |
Tip: Study-group code values should match your Subject Group Class coding.
Stratification Factors (Stratified Permuted Block Design only)
When the selected algorithm is Stratified Permuted Block Design, use the Stratification Factors section to add each stratification variable from CRF data.
Typical fields include Stratification From, CRF/Version, Visit/Event, and Field. Use categorical inputs (for example Radio or Checkbox options) so strata are defined consistently.
Step 4: Select event to Randomize
In Select event to Randomize, select Edit.
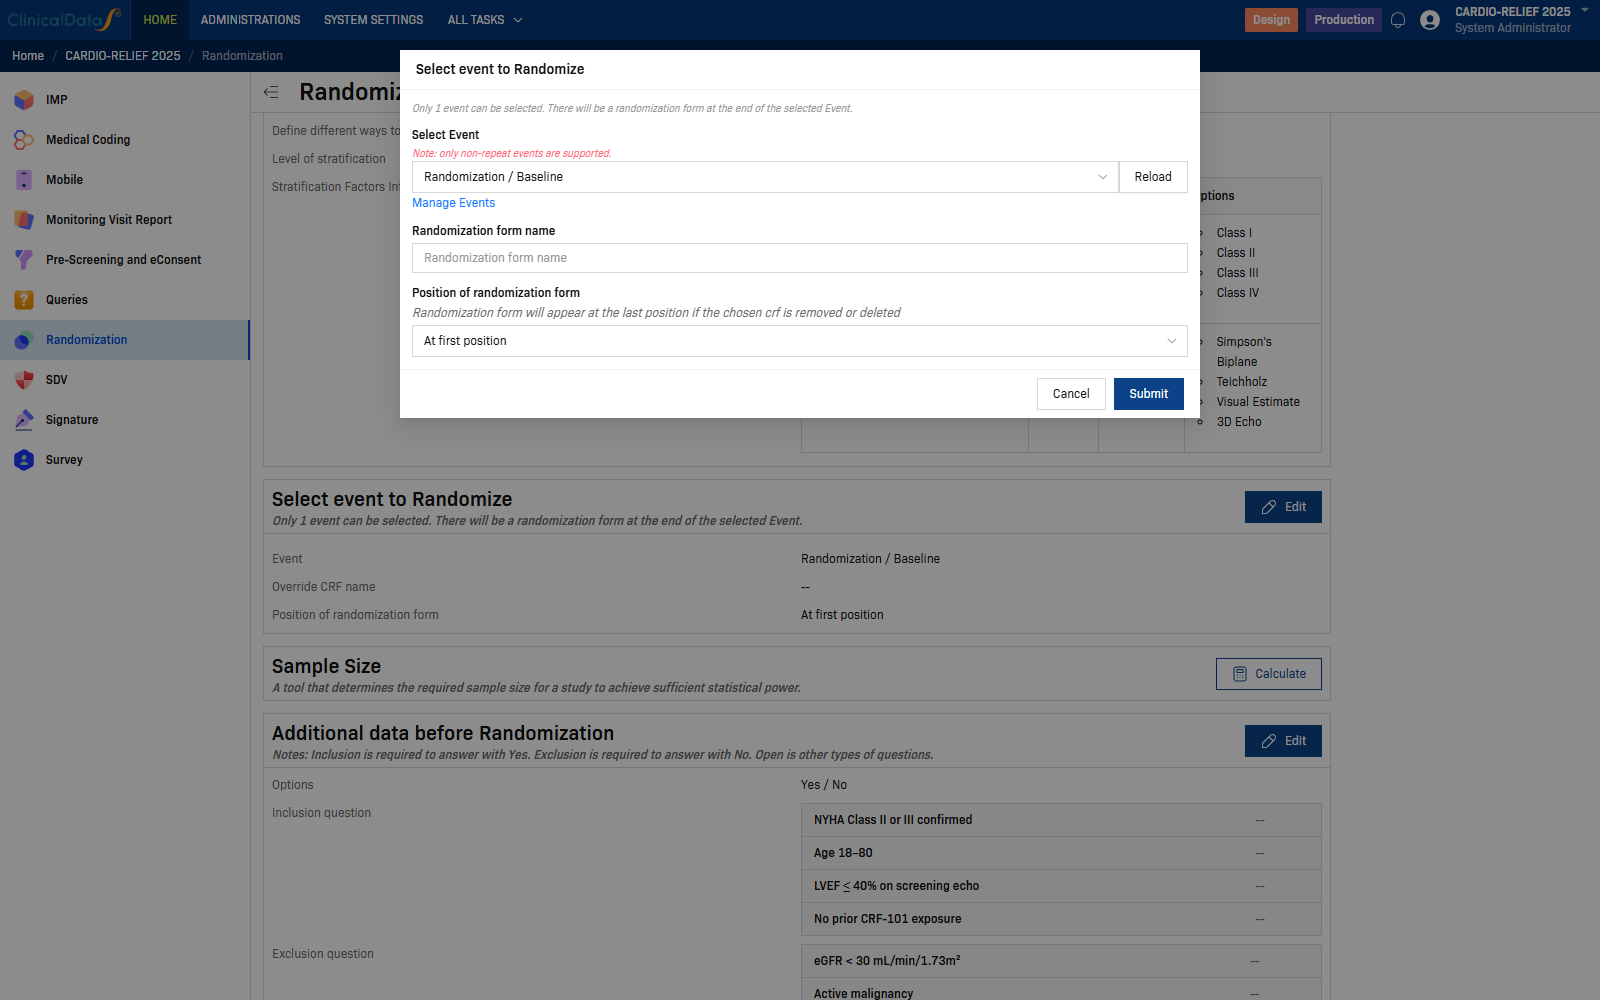
| Setting | Description |
|---|---|
| Select Event | Event where randomization is performed. |
| Randomization form name | Optional name for the generated randomization form. |
| Position of randomization form | Placement of the randomization form in the selected event. |
Select Submit to save.
Note: Only one event can be selected. A randomization form is added to that event.
Step 5: Calculate sample size (optional)
In Sample Size, select Calculate.
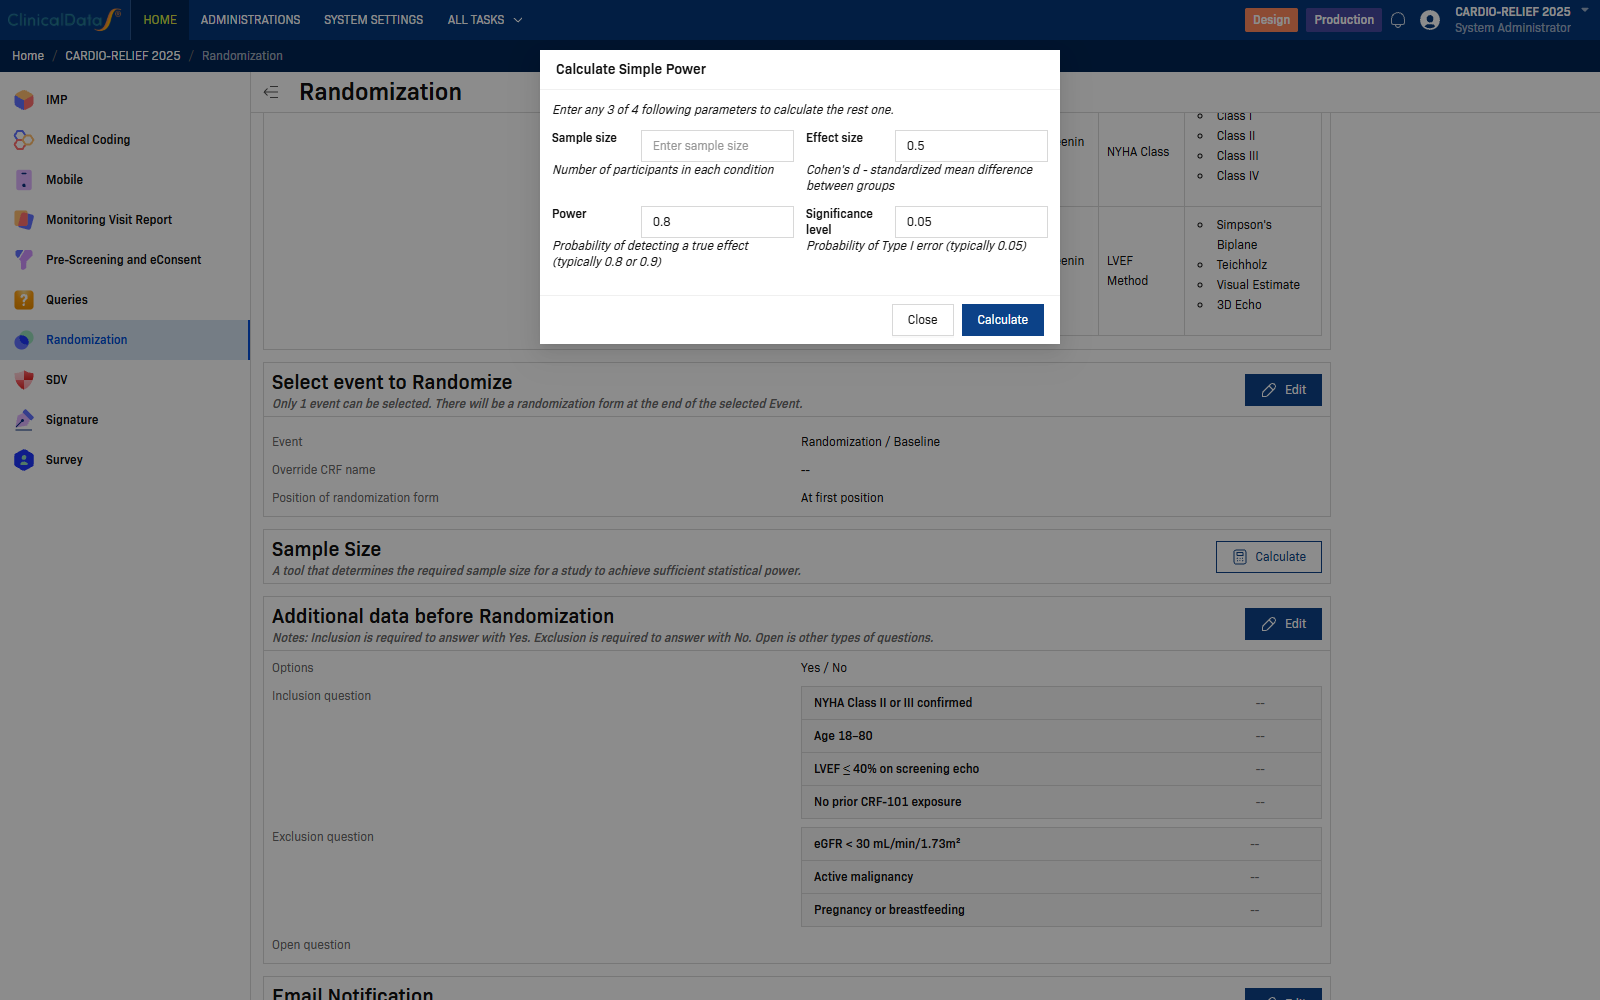
The dialog calculates one value when you provide the other three:
- Sample size
- Effect size
- Power
- Significance level
Step 6: Define additional data before randomization
In Additional data before Randomization, select Edit.

This dialog includes:
- Options (default Yes / No, with custom option support)
- Inclusion question tab (must be answered Yes)
- Exclusion question tab (must be answered No)
- Open question tab (non-gating questions)
Select Submit to save.
Step 7: Configure email notification
In Email Notification, select Edit.
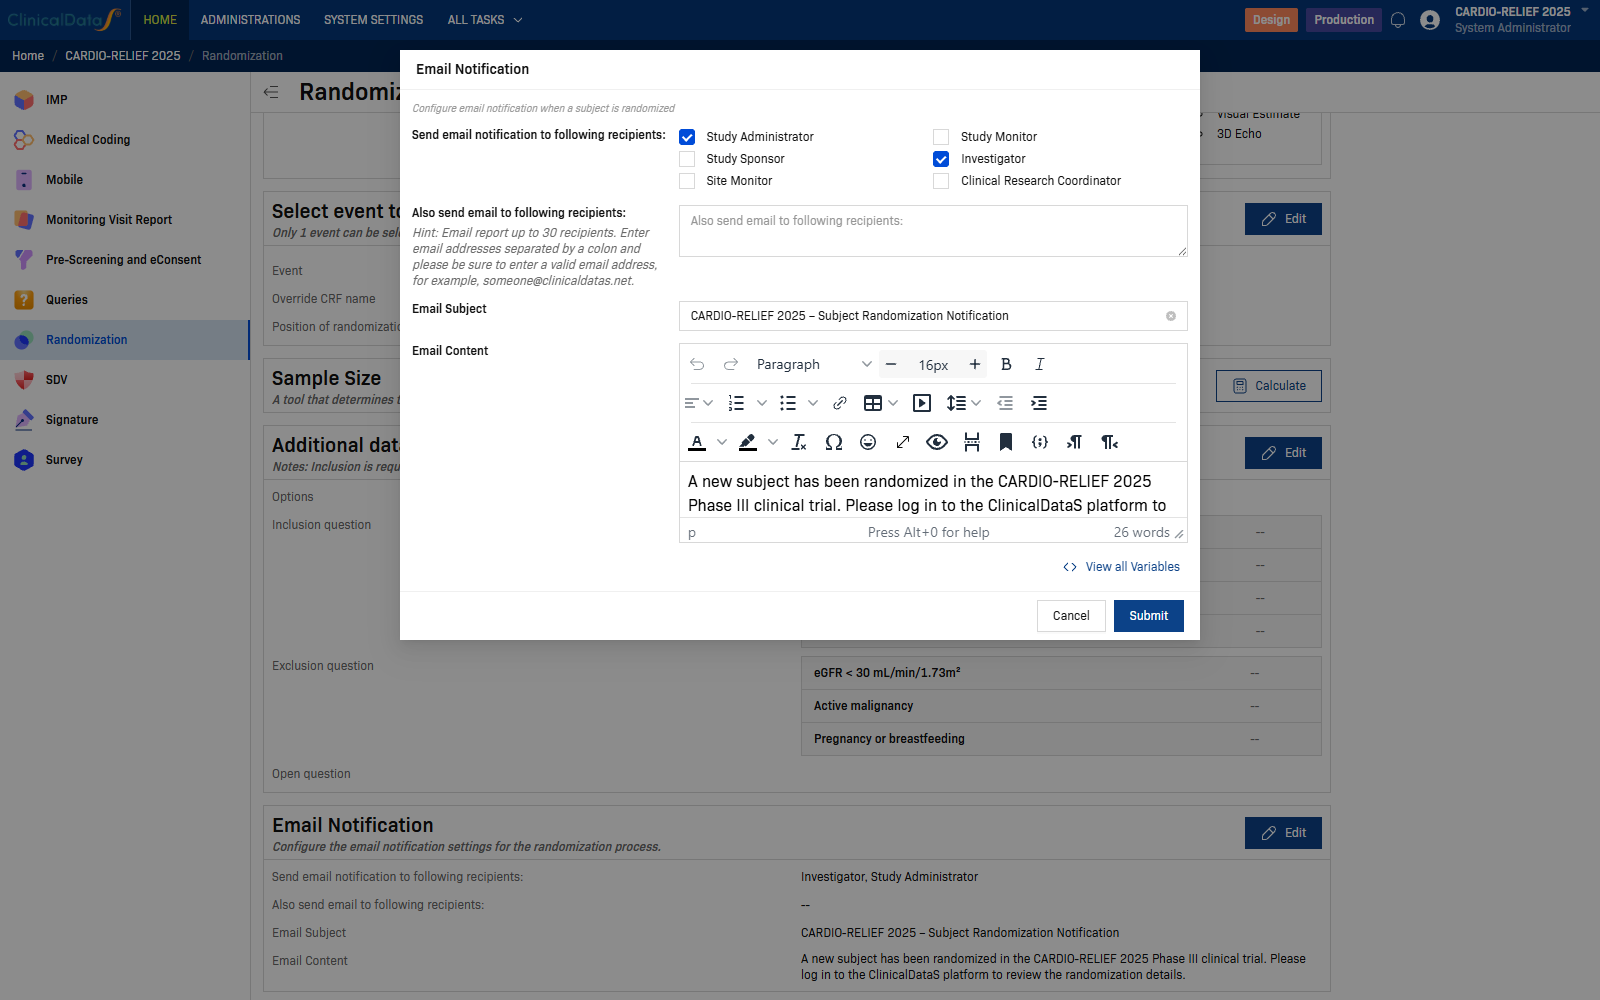
| Setting | Description |
|---|---|
| Send email notification to following recipients | Role-based recipients (for example Study Administrator, Study Monitor, Study Sponsor, Investigator, Site Monitor, Clinical Research Coordinator). |
| Also send email to following recipients | Additional email addresses. |
Select Submit to save.
Verify the setup
After setup, confirm:
- Blinding and algorithm match protocol requirements.
- Study groups, codes, and weights are correct.
- The intended randomization event is selected.
- Additional-data rules reflect eligibility logic.
- Notification recipients are complete and valid.