Returns
A return records the transfer of unused, expired, damaged, or excess investigational product (IP) from a site back to the sponsor, another site pharmacy, or a central warehouse. Both the Site Pharmacist and the Sponsor/Admin can initiate a return request.
Navigate: IMP → Transfer → Returns
Return workflow overview
A return request goes through up to seven stages before it is closed. The full status progression is shown below.
| Stage | Who acts | What happens |
|---|---|---|
| Draft | Site Pharmacist or Sponsor/Admin | Return request created and can be edited |
| Requested | Site Pharmacist submits | Sponsor is notified and can review |
| Approved | Sponsor/Admin approves | Site Pharmacist is notified to begin preparing |
| Preparing | Site Pharmacist | Site confirms goods are ready and dispatched |
| On Delivery | — | IP is in transit |
| Received | Warehouse/Destination | Receiving party confirms receipt |
| Closed | System | All confirmations complete, return closed |
| Quarantined | — | Issues reported at receipt (e.g., missing or damaged items) |
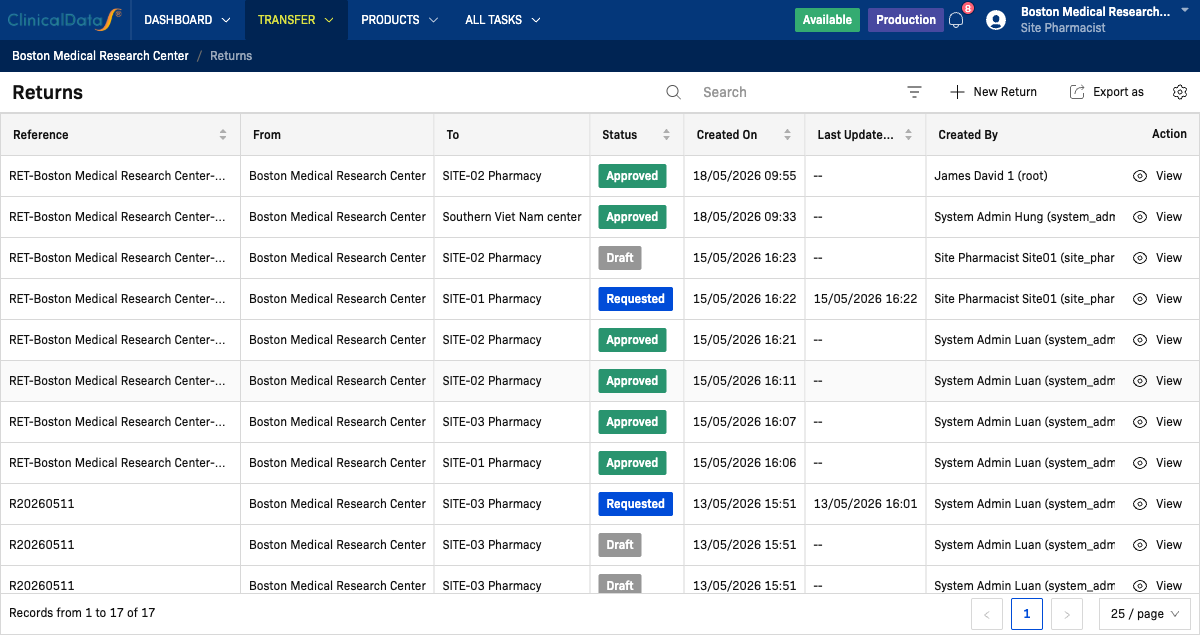
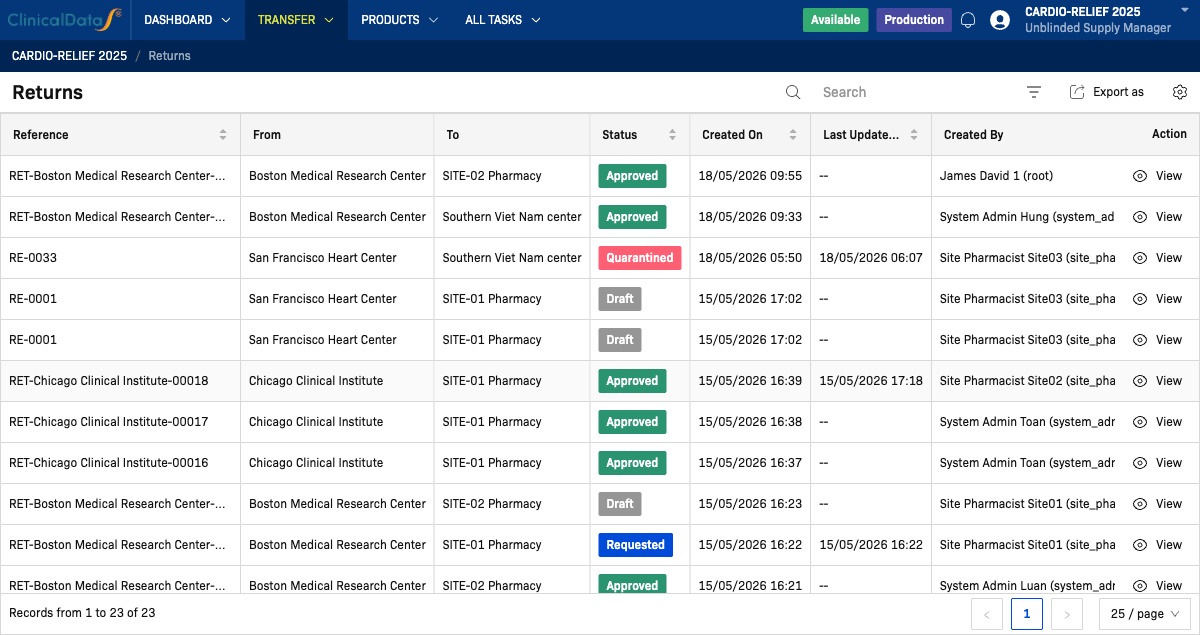
Returns list columns
| Column | Description |
|---|---|
| Reference | System-generated return identifier (e.g., RET-Boston Medical Research Center-00014) |
| From | The site or location sending the IP |
| To | The destination site pharmacy or warehouse |
| Status | Current return status (Draft / Requested / Approved / …) |
| Created On | Date and time the return was created |
| Last Updated On | Date and time of the most recent status change |
| Created By | User who created the return request |
| Action | View — open the return detail page |
Site Pharmacist workflow
The Site Pharmacist is responsible for creating, editing, and preparing return requests for their site.
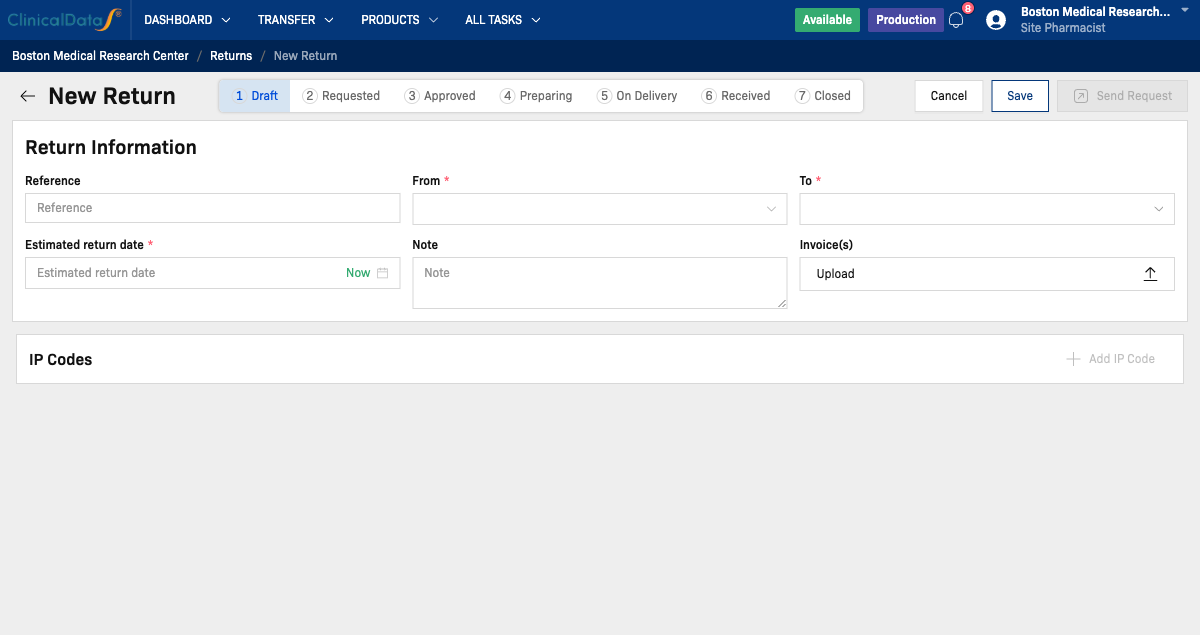
Step 1 — Create a new return (Draft)
-
Navigate to IMP → Transfer → Returns.
-
Click + New Return in the top-right corner.
-
Fill in the return information:
Field Required Description Reference Optional Custom reference number. If left blank, the system generates one automatically From Required The site initiating the return (pre-filled with your site) To Required Destination — another site pharmacy or warehouse Estimated return date Required Expected date of dispatch Note Optional Reason for the return or any remarks Invoice(s) Optional Upload supporting documents -
In the IP Codes section, click + Add IP Code to select the IP codes to return.
-
Click Save to save as Draft. The return can still be edited at this stage.
Step 2 — Edit a Draft return
From the Returns list, click View on any Draft return you created.

- Save — save changes without submitting.
- Send Request — submit the return request to the Sponsor for review. This moves the status from Draft → Requested.
- Cancel — discard unsaved changes.
Once you click Send Request, the return is locked for editing. The Sponsor must review and approve it before the next step.
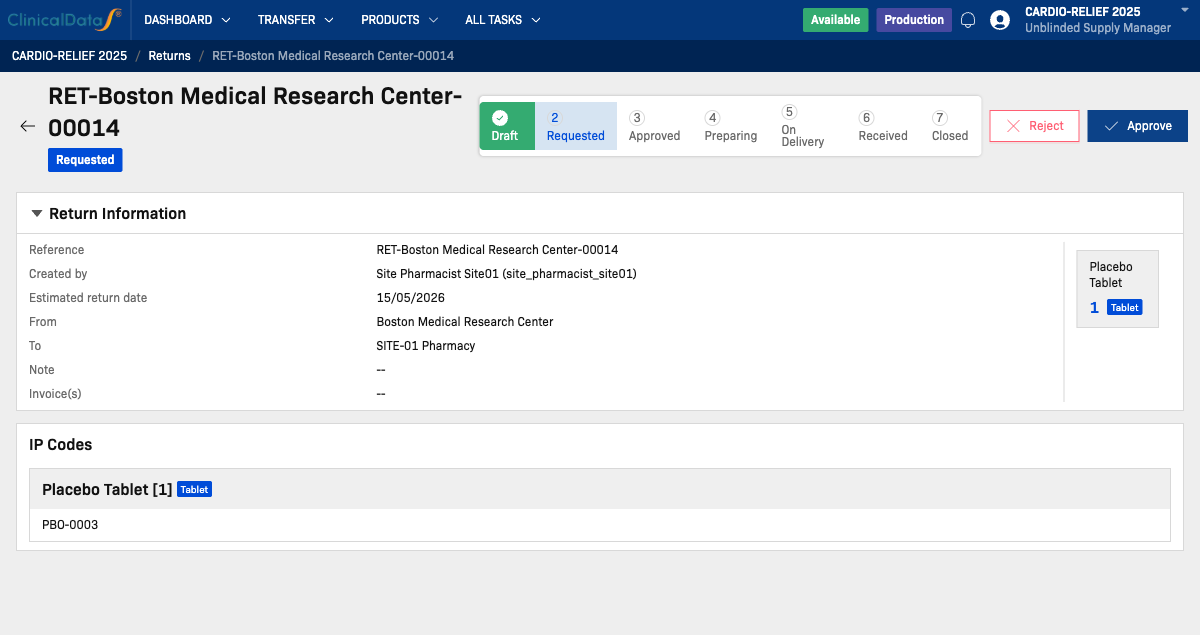
Step 3 — Wait for Sponsor approval (Requested)
After submitting, the return status changes to Requested. You can view the return detail page, which shows the full return information and IP codes.
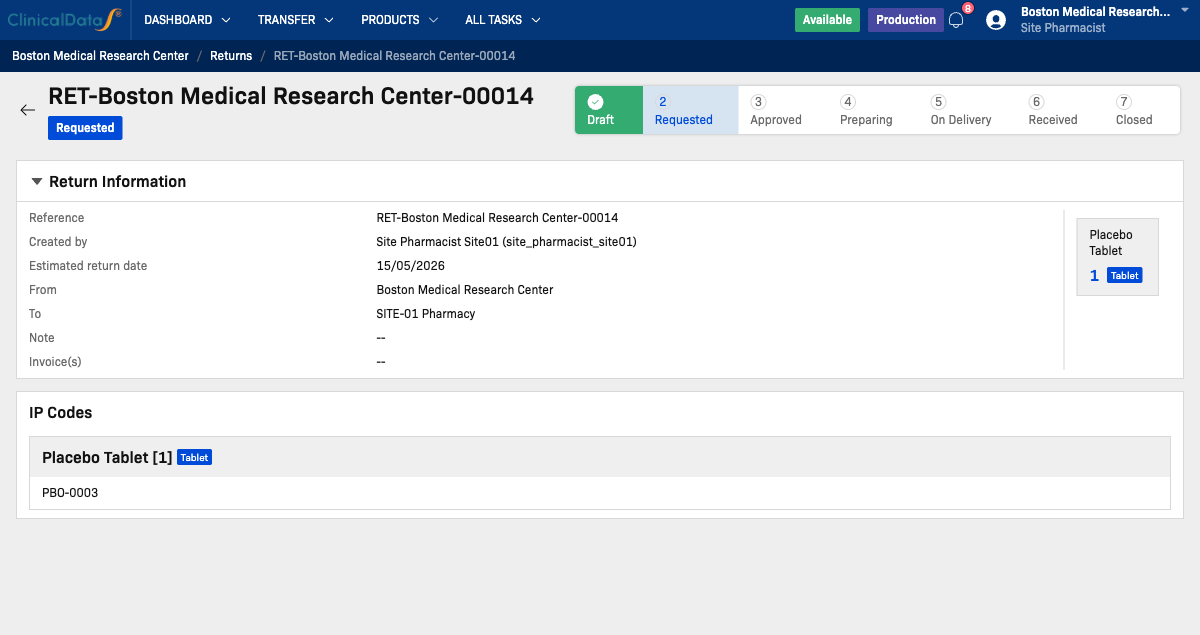
The Sponsor will review the request and either Approve or Reject it.
Step 4 — Prepare for dispatch (Approved → Preparing)
When the Sponsor approves the request, the status changes to Approved and a Start preparing button appears.
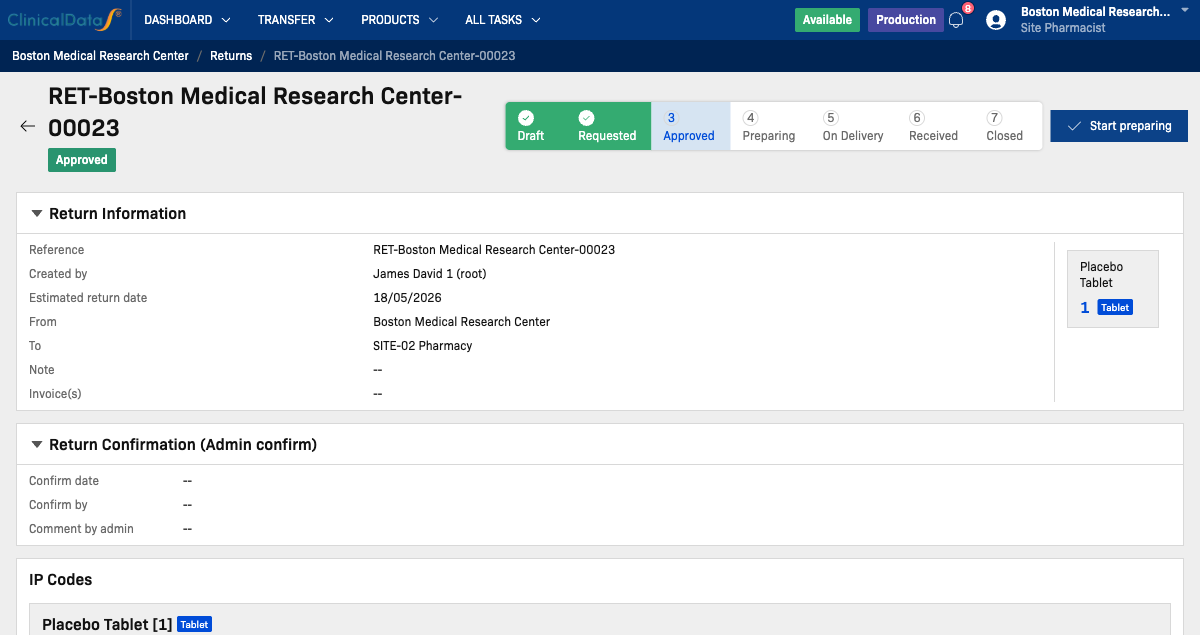
Click Start preparing to confirm that goods are being assembled. The status moves to Preparing.
Once the goods are ready and dispatched, confirm the shipment in the Return Confirmation (Site Staff confirm) section. This moves the status to On Delivery.
Sponsor workflow
The Sponsor (Unblinded Supply Manager) has a global view of all return requests across all sites. The Sponsor can also create return requests directly.
Navigate to the same IMP → Transfer → Returns screen from the Sponsor account.
Review and approve a Requested return
-
Click View on a return with Requested status.
-
Review the Return Information and IP Codes sections.
-
Click Approve to approve the return, or Reject to reject it.
- Approve → status changes to Approved; Site Pharmacist is notified.
- Reject → status changes back to Draft; Site Pharmacist can edit and resubmit.
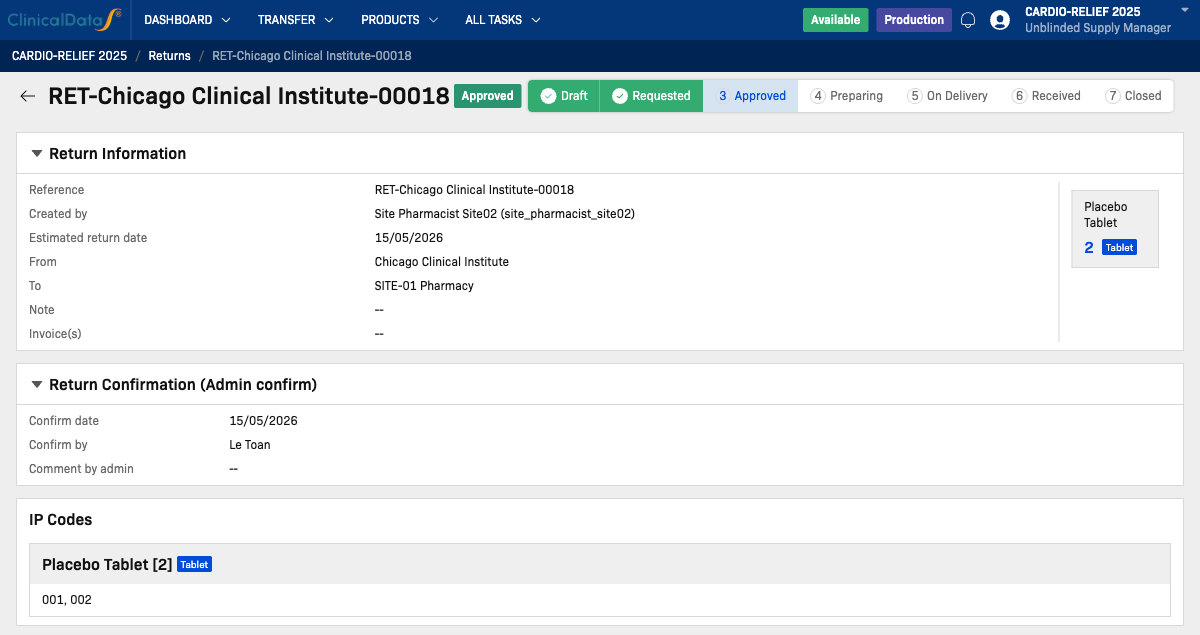
View an Approved return
Once approved, the Sponsor can see the return detail including the Return Confirmation (Admin confirm) section where they can add an admin-level confirmation note once the physical review is complete.
Create a return request (Sponsor-initiated)
The Sponsor can also initiate a return on behalf of a site. The creation form is the same as the Site Pharmacist's New Return form. When the Sponsor creates a return, it is created with status Approved by default — the Site Pharmacist will see a Start preparing button immediately.
Return Confirmation sections
A completed return has three confirmation records, visible on the return detail page:
| Section | Who fills it | When |
|---|---|---|
| Return Confirmation (Admin confirm) | Sponsor / Admin | After approving — confirms the return is authorized |
| Return Confirmation (Site Staff confirm) | Site Pharmacist | When goods are ready and dispatched |
| Return Confirmation (Warehouse confirm) | Receiving warehouse staff | Upon receiving the shipment |
Each section captures: Confirm date, Confirm by, and Comment.
Quarantined status
If the receiving warehouse finds discrepancies upon receipt (e.g., missing or damaged IP codes), they record the issues in the IP Shipping Error section. The return status changes to Quarantined.
Quarantined returns require follow-up investigation by the Sponsor before the IP codes can be written off or reconciled.
Returns can only be created for IP codes that are available at the site. IP codes still in the Central Depot or that have not yet been assigned to a receipt cannot be returned through this workflow.