Overview
Use this page to configure visit-specific monitoring report behavior for each study before report operations start.
Path: Home → Study → Monitoring Visit
Configuration URL pattern: https://[instance]/home/study/[studyId]/apps/monitoring
Live sample used in this guide: https://test-2025.clinicaldatas.net/home/study/S_Z0wtgjApA3j3u4jSKF/apps/monitoring
Primary configuration account: study_admin
Backup account: system_administrator_luan
Configuration Options
The configuration screen has two sections:
- Visit Configuration - Define setup per visit type
- Site Branches - Define or update branch information under each site
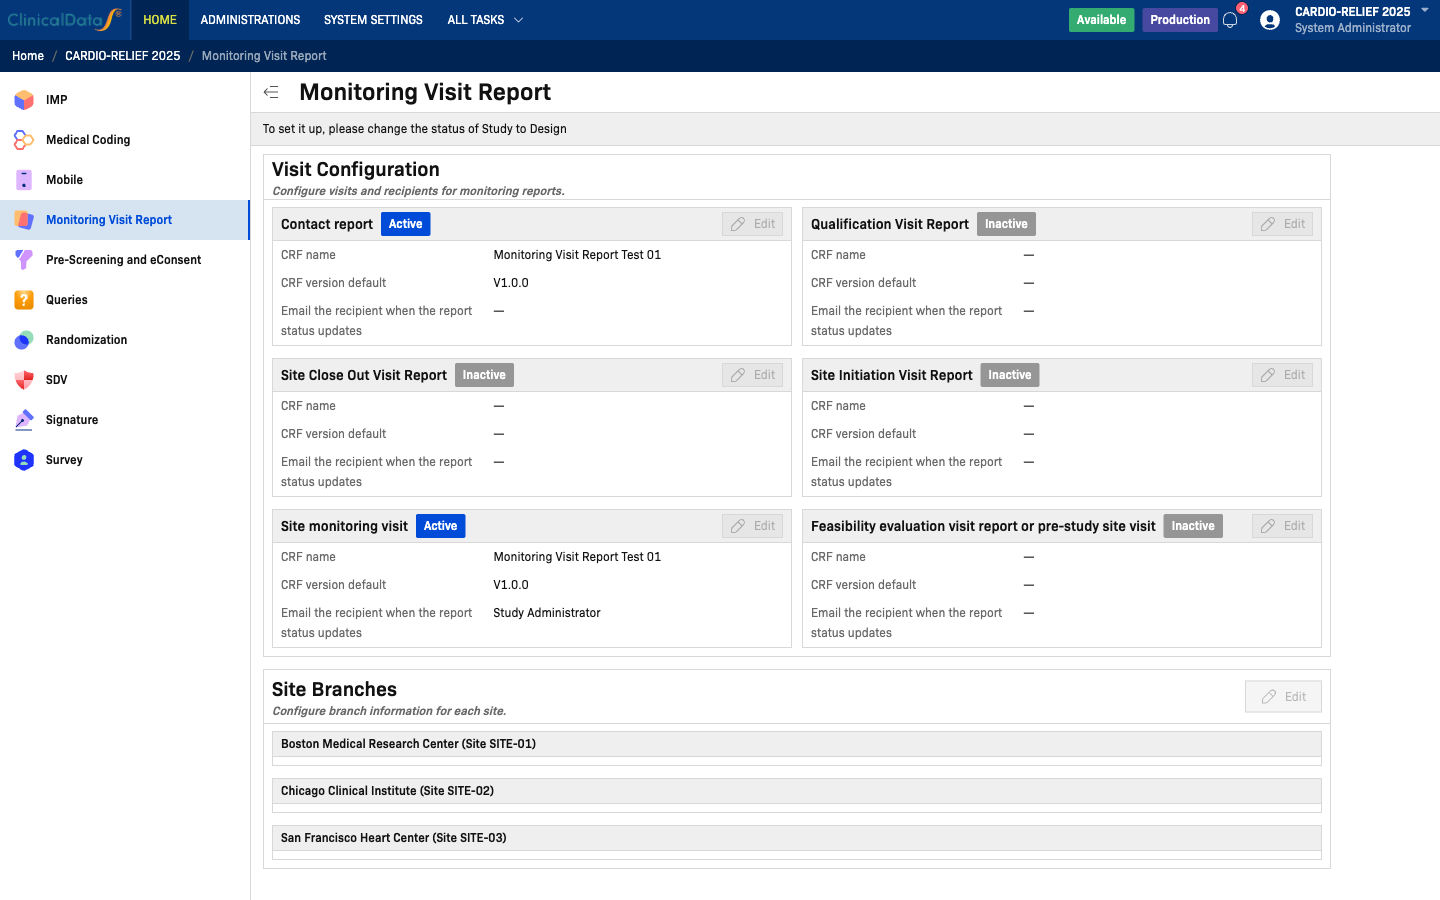
Configure Visit Types
In Visit Configuration, each visit type has its own card (for example: Contact report, Site monitoring visit, Qualification Visit Report, Site Initiation Visit Report).
Click Edit on a visit type to open Visit configuration.
Fields in Visit Configuration
| Field | Description | Required |
|---|---|---|
| Active switch | Enable or disable a visit type | Yes |
| Visit name | Display name used in dashboard and report creation | Yes |
| CRF name | CRF used as report template | Yes |
| CRF version default | Default version used when creating report | Yes |
| Email the recipient when the report status updates | Role-based notification recipients | Recommended |
| Specific people | Optional ad-hoc emails separated by semicolon (;) | Optional |
| Add more rows | Add additional recipient lines | Optional |
Notification Behavior
Email recipients in this section are used for report status change notifications.
Recommended practice:
- Include operational roles for early states (Draft/Completed handling).
- Include sponsor-facing roles for Reviewed/Finalized/Approved steps.
- Use Specific people only when role-based recipients are not sufficient.
After updating fields, click Submit to save or Cancel to discard changes.
If CRF name or CRF version default is missing for an active visit type, users cannot create new reports for that visit type.
Screenshot pending:
10-visit-configuration-edit-modal.png(generated when an enabled Edit action is available for this account).
Configure Site Branches
In Site Branches, click Edit to open the branch dialog.
Per site, use Add more branch to register additional branch entries, then click Submit to save.
| Site Branch Data | Why It Matters |
|---|---|
| Branch name | Improves report context by location |
| Branch address/contact | Supports monitoring communication and traceability |
| Branch updates over time | Keeps operational metadata current |
Screenshot pending:
11-site-branches-modal.png(generated when an enabled Site Branch edit action is available).
Recommended Setup Sequence
- Enable only visit types used by your monitoring process.
- Assign CRF and default CRF version for each active visit type.
- Configure recipient roles for status update notifications.
- Review site branches for each site and add missing branches.
- Save and verify by opening the Dashboard and checking visit type counters.
Role-Based Validation After Configuration
Use these accounts to confirm setup quality before publishing docs:
- Login as site01_monitor and create a report for an active visit type.
- Login as site01_reviewer and validate review-stage actions are visible.
- Login as study_sponsor and confirm approval action is available for finalized reports.