The Screening Settings tab lets you control how screening codes are generated, what personal information is collected from participants, whether document attachments are required, and whether additional CRF data can be captured during pre-screening.
How to access
- From Home, select your study.
- In the left navigation, click Pre-Screening and eConsent.
- The app opens on the Screening Settings tab by default.
Configuration requires the study to be in Design status. When the study is Available or Frozen, the banner "To set it up, please change the status of Study to Design" is shown and all settings are read-only.
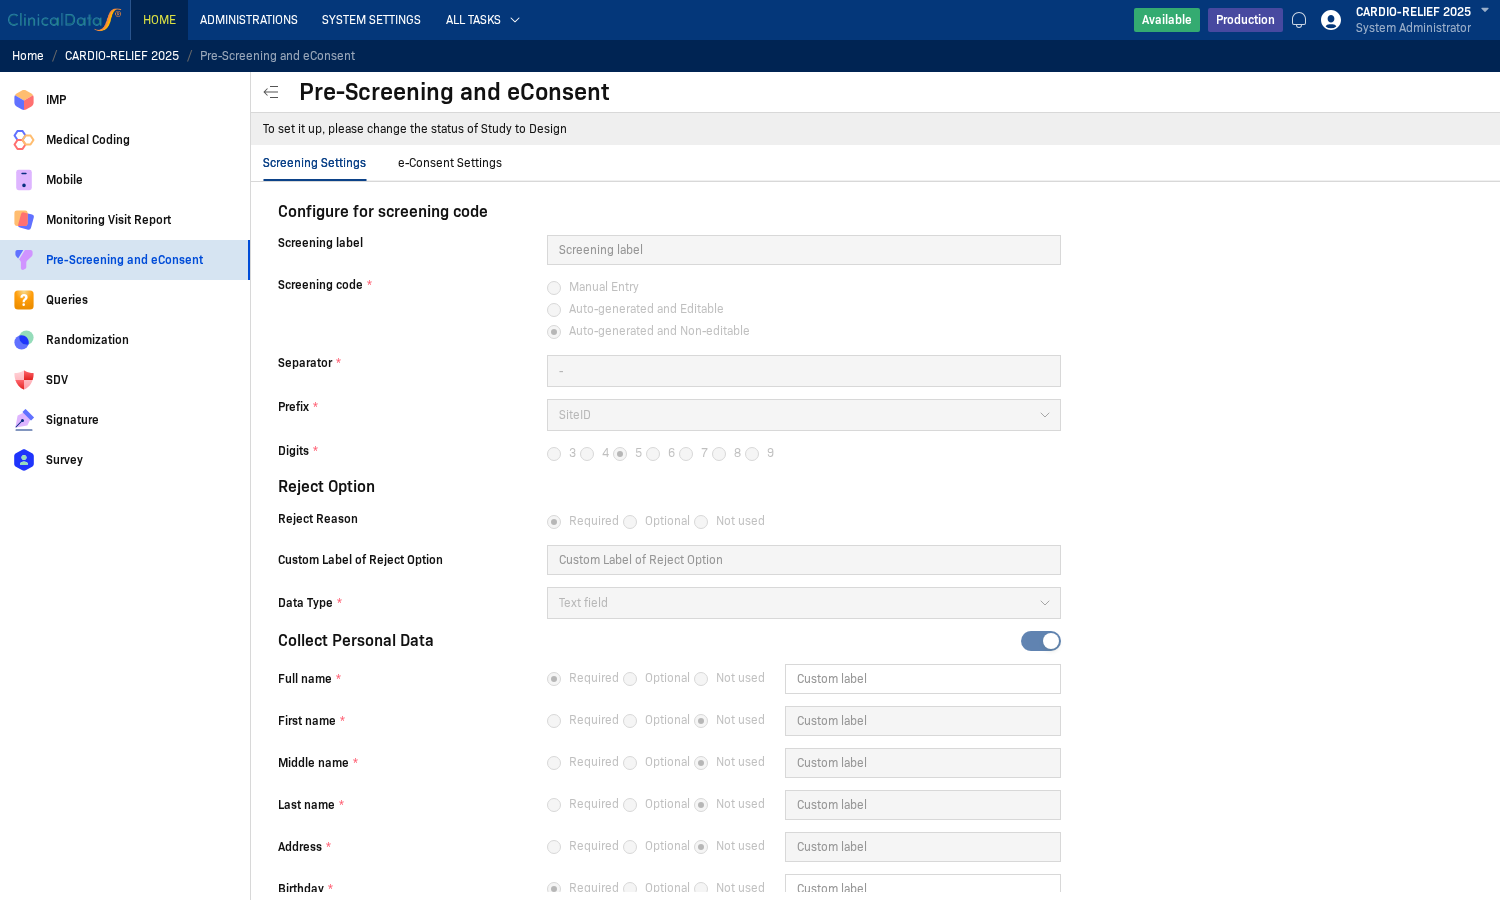
Configure for screening code
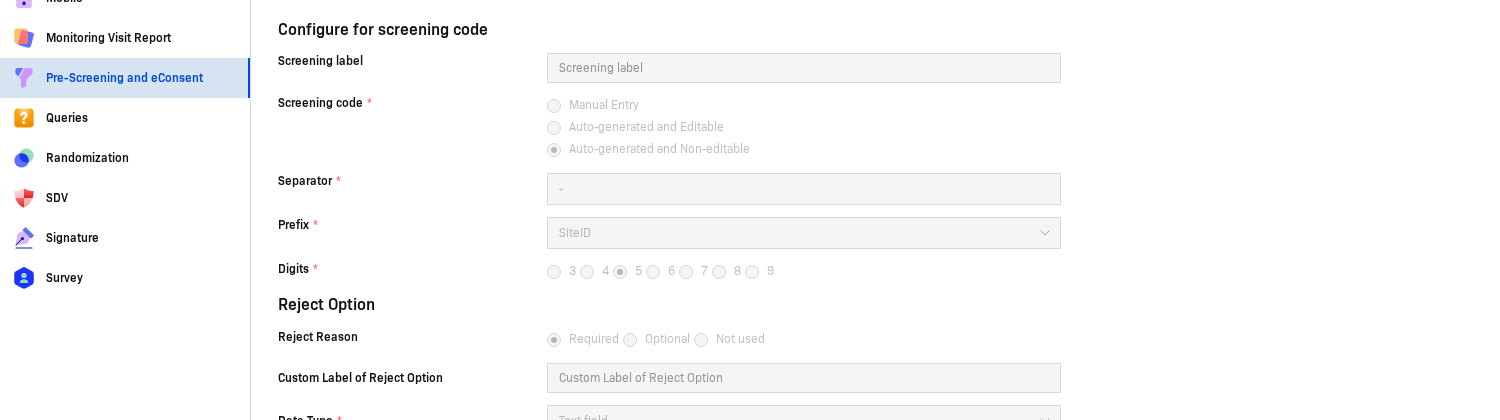
Configure how screening codes are generated for new participants:
| Setting | Options | Description |
|---|---|---|
| Screening label | Free text | Custom label shown in the UI for the screening code field |
| Screening code | Manual Entry / Auto-generated and Editable / Auto-generated and Non-editable | How the screening code is assigned to each participant |
| Separator | Free text | Character separating the prefix from the digits (e.g., -) |
| Prefix | Dropdown | Source for the prefix (e.g., SiteID) |
| Digits | 3 / 4 / 5 / 6 / 7 / 8 / 9 | Number of digits in the auto-generated portion |
Reject Option

| Setting | Options / Description |
|---|---|
| Reject Reason | Required / Optional / Not used |
| Custom Label of Reject Option | Free text — custom label for the reject reason field in the UI |
| Data Type | Type of input field for the reject reason (e.g., Text field) |
Collect Personal Data

| Toggle | Description |
|---|---|
| Collect Personal Data | Enable to collect participant personal information during screening |
| Collect More Dynamic Data | Enable to define custom additional fields for screening. For complex layouts (tables, repeating tables, sliders), use Form Builder instead. |
When Collect Personal Data is enabled, configure each field individually. Each field can be set to Required, Optional, or Not used, and each supports a Custom label to override the default display name:
| Field | Default options |
|---|---|
| Full name | Required / Optional / Not used + Custom label |
| First name | Required / Optional / Not used + Custom label |
| Middle name | Required / Optional / Not used + Custom label |
| Last name | Required / Optional / Not used + Custom label |
| Address | Required / Optional / Not used + Custom label |
| Birthday | Required / Optional / Not used + Custom label — includes date format options |
| Phone | Required / Optional / Not used + Custom label |
| Required / Optional / Not used + Custom label |
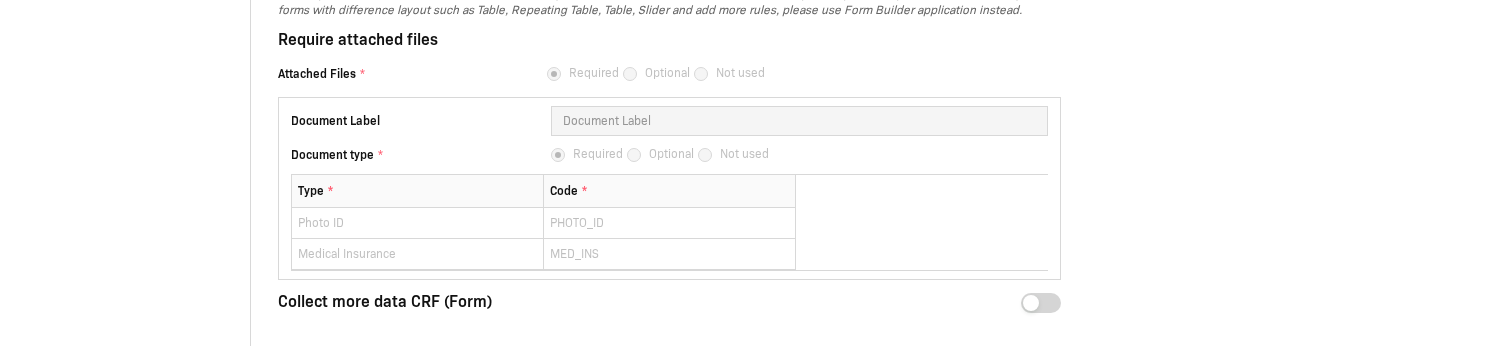
Require attached files
| Setting | Options / Description |
|---|---|
| Attached Files | Required / Optional / Not used |
| Document Label | Free text — custom label for the file upload field |
| Document type | Required / Optional / Not used — whether the document type must be specified |
When Attached Files is set to Required or Optional, you can define expected document types in the table below:
| Column | Description |
|---|---|
| Type | Display name for the document (e.g., Photo ID) |
| Code | Internal code for the document (e.g., PHOTO_ID) |
Example entries: Photo ID / PHOTO_ID, Medical Insurance / MED_INS.
Collect more data CRF (Form)
| Toggle | Description |
|---|---|
| Collect more data CRF (Form) | Enable to link a CRF for additional data capture during pre-screening |