- Study status must be Available
- IP Codes must be in Released status before they can be included in a receipt
- The Manage Warehouse toggle must be On in IMP Configuration. When off, IP codes move directly from the Central Depot to site pharmacies and this step does not exist.
Receipts
The Receipts page is used by the Sponsor or Supply Manager to record the inbound transfer of investigational product (IP) from the Central Depot to a Warehouse. Each receipt represents a physical shipment that has arrived at the destination warehouse and needs to be confirmed in CDS to update inventory.
Navigate: IMP → Transfer → Receipts

Receipts list
The list shows all receipts for the study with the following columns:
| Column | Description |
|---|---|
| Reference | System-generated receipt reference number (sortable) |
| From | Source location — always Central Depot |
| To | Destination warehouse |
| Status | Receipt status (sortable) |
| Created On | Date the receipt record was created (sortable) |
| Last Updated On | Date of the most recent update (sortable) |
| Created By | User who created the receipt |
| Action | Available actions for this record |
Use the Search box to filter receipts by reference or warehouse name. Click Export as to download the list.
Create a new receipt
Click New Receipt to open the 3-step creation wizard.
Step 1 — Receipt Information
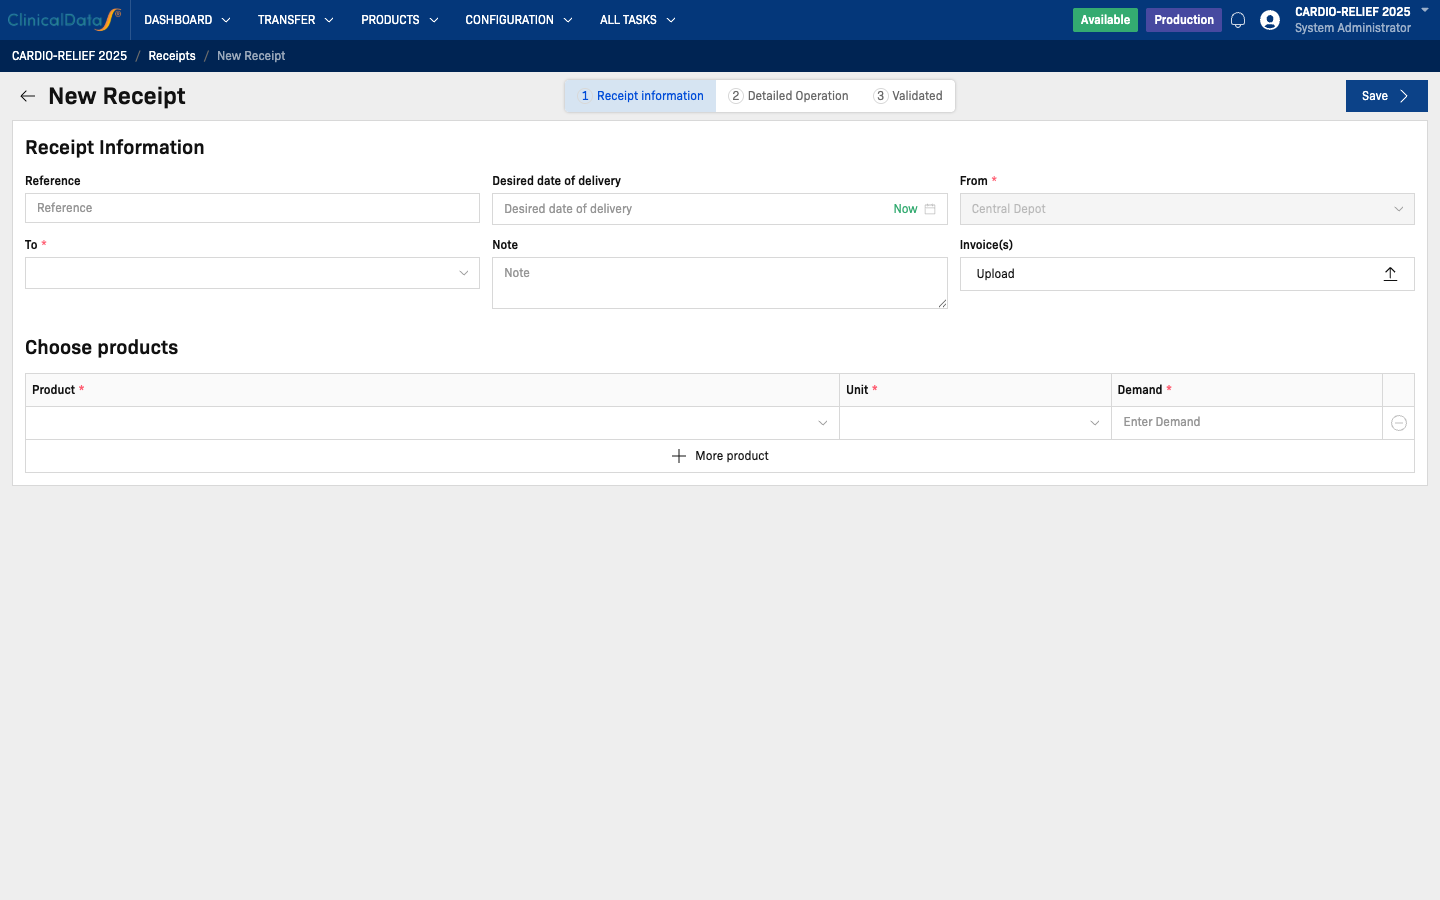
Fill in the receipt details:
| Field | Required | Description |
|---|---|---|
| Reference | No | Optional reference number (e.g., from the shipment documentation) |
| Desired date of delivery | No | Expected or actual arrival date. Click Now to use the current date/time |
| From | Yes | Pre-filled as Central Depot — cannot be changed |
| To | Yes | Select the destination warehouse from the dropdown |
| Note | No | Optional free-text notes about the shipment |
| Invoice(s) | No | Upload supporting documents (e.g., delivery note, invoice) |
Then in the Choose products table, add one row per product:
| Column | Required | Description |
|---|---|---|
| Product | Yes | Select the product from the dropdown |
| Unit | Yes | Unit of measure — populated automatically after selecting a product |
| Demand | Yes | Quantity received for this product |
Click + More product to add additional product rows.
Step 2 — Detailed Operation

The system breaks the receipt down by product batch. For each batch you will see a split-panel interface:
| Panel | Description |
|---|---|
| Available | IP codes with Released status that can be included in this receipt |
| Selected Kits | IP codes confirmed for shipment in this receipt |
The counter next to the batch name shows [selected / required]. All batches must be satisfied before you can validate.
To select IP codes:
- Check the checkboxes next to the IP codes you want to include in the Available panel.
- Click Move to select — the codes move to the Selected Kits panel.
- Repeat for each batch until all counters show the required quantity.
Use Edit (pencil icon) next to a product to adjust the demand or change products if needed.
When all batches are satisfied, click Validate (top right) to advance to Step 3. A confirmation dialog will prompt you to enter your password to sign off the action.
Click Reject to discard the receipt entirely.
Step 3 — Validated
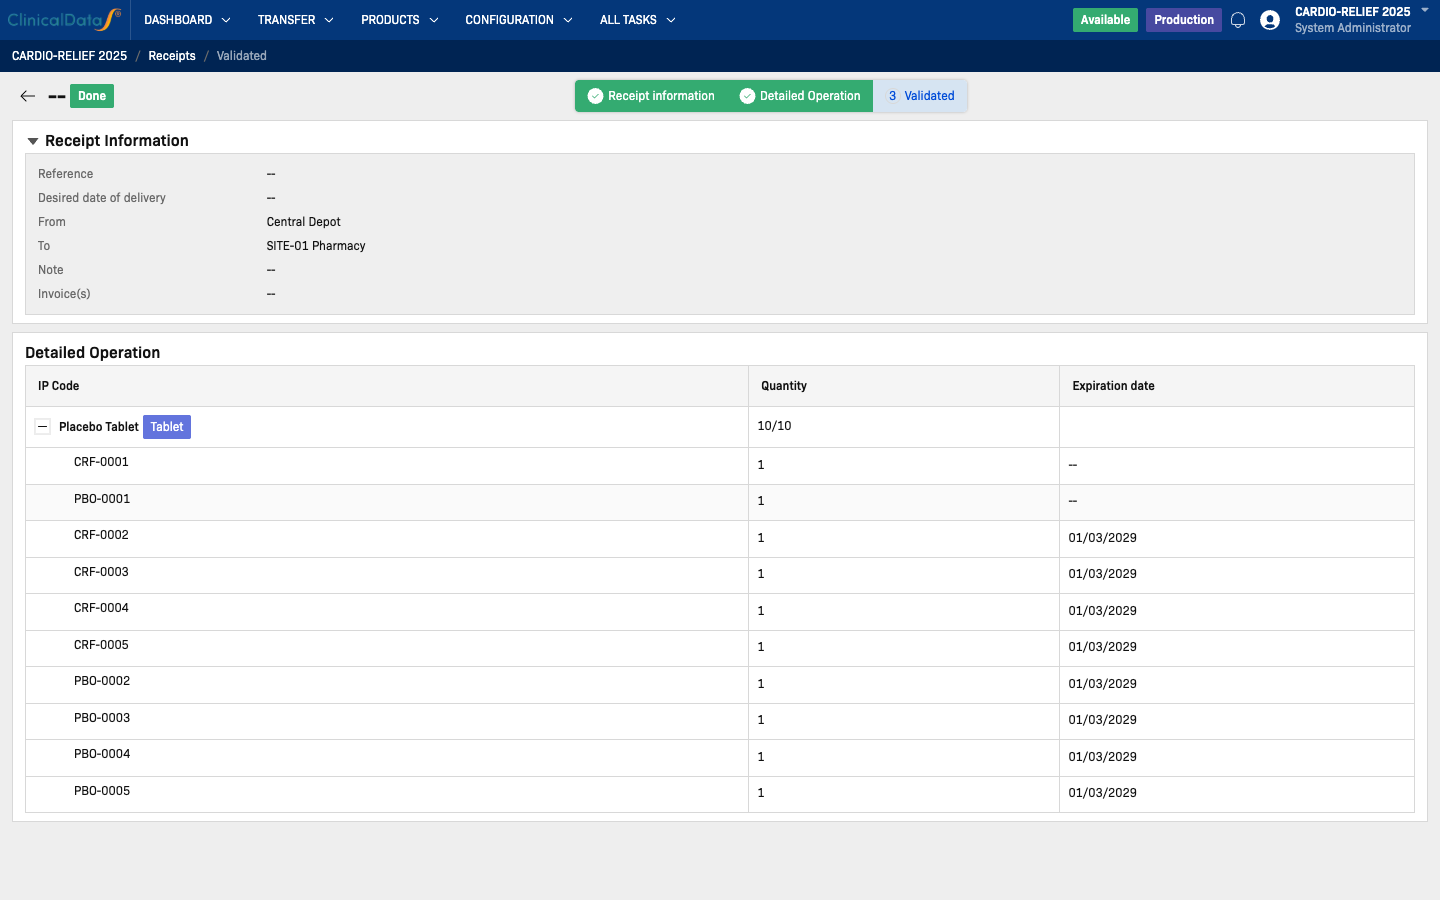
After validation the system shows a read-only summary of the completed receipt. The Detailed Operation table lists every IP code assigned to this receipt, along with quantity and expiration date.
The receipt status is set to Done and the system:
- Updates each included IP code status to Received
- Records the inventory movement into the destination warehouse
- Creates a read-only receipt record with a system-generated reference
Completed receipts
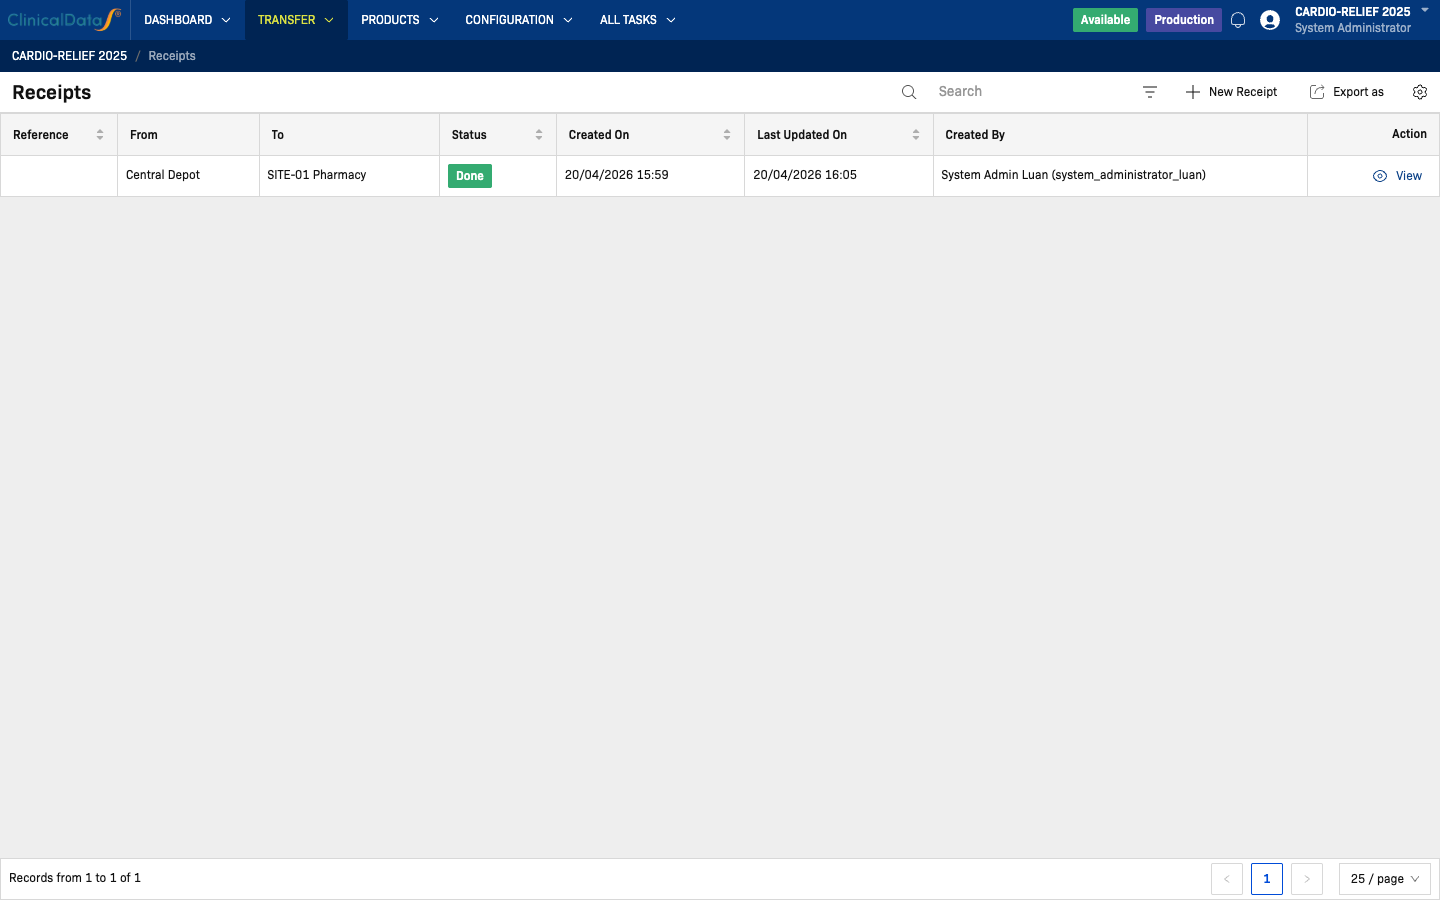
Validated receipts appear in the list with a Done status badge. Click View to open the read-only receipt record at any time.
Once a receipt is validated it cannot be edited or deleted. If a receipt was created in error, contact your study administrator.